Installing & Getting Set Up
Alrighty! Welcome aboard, let's do this thing!
Installing Dynamatic App
Once you've installed the app from the Shopify App Store it is time to get our app activated on your store. We recommend duplicating your live theme, and only making the changes in a duplicate theme. This will keep all the changes you make and the entire Dynamatic set up limited to just the duplicate theme, leaving your live store untouched while you work on setting up Dynamatic App and perfecting the look and feel + strategy.
How to Create a Duplicate Theme
If you aren't familiar with creating a duplicate theme here's an easy-to-follow guide.
Step 1: Head to your shopify admin and click on Sales Channels > Online Store
This will take you to your themes area of the shopify admin pannel. 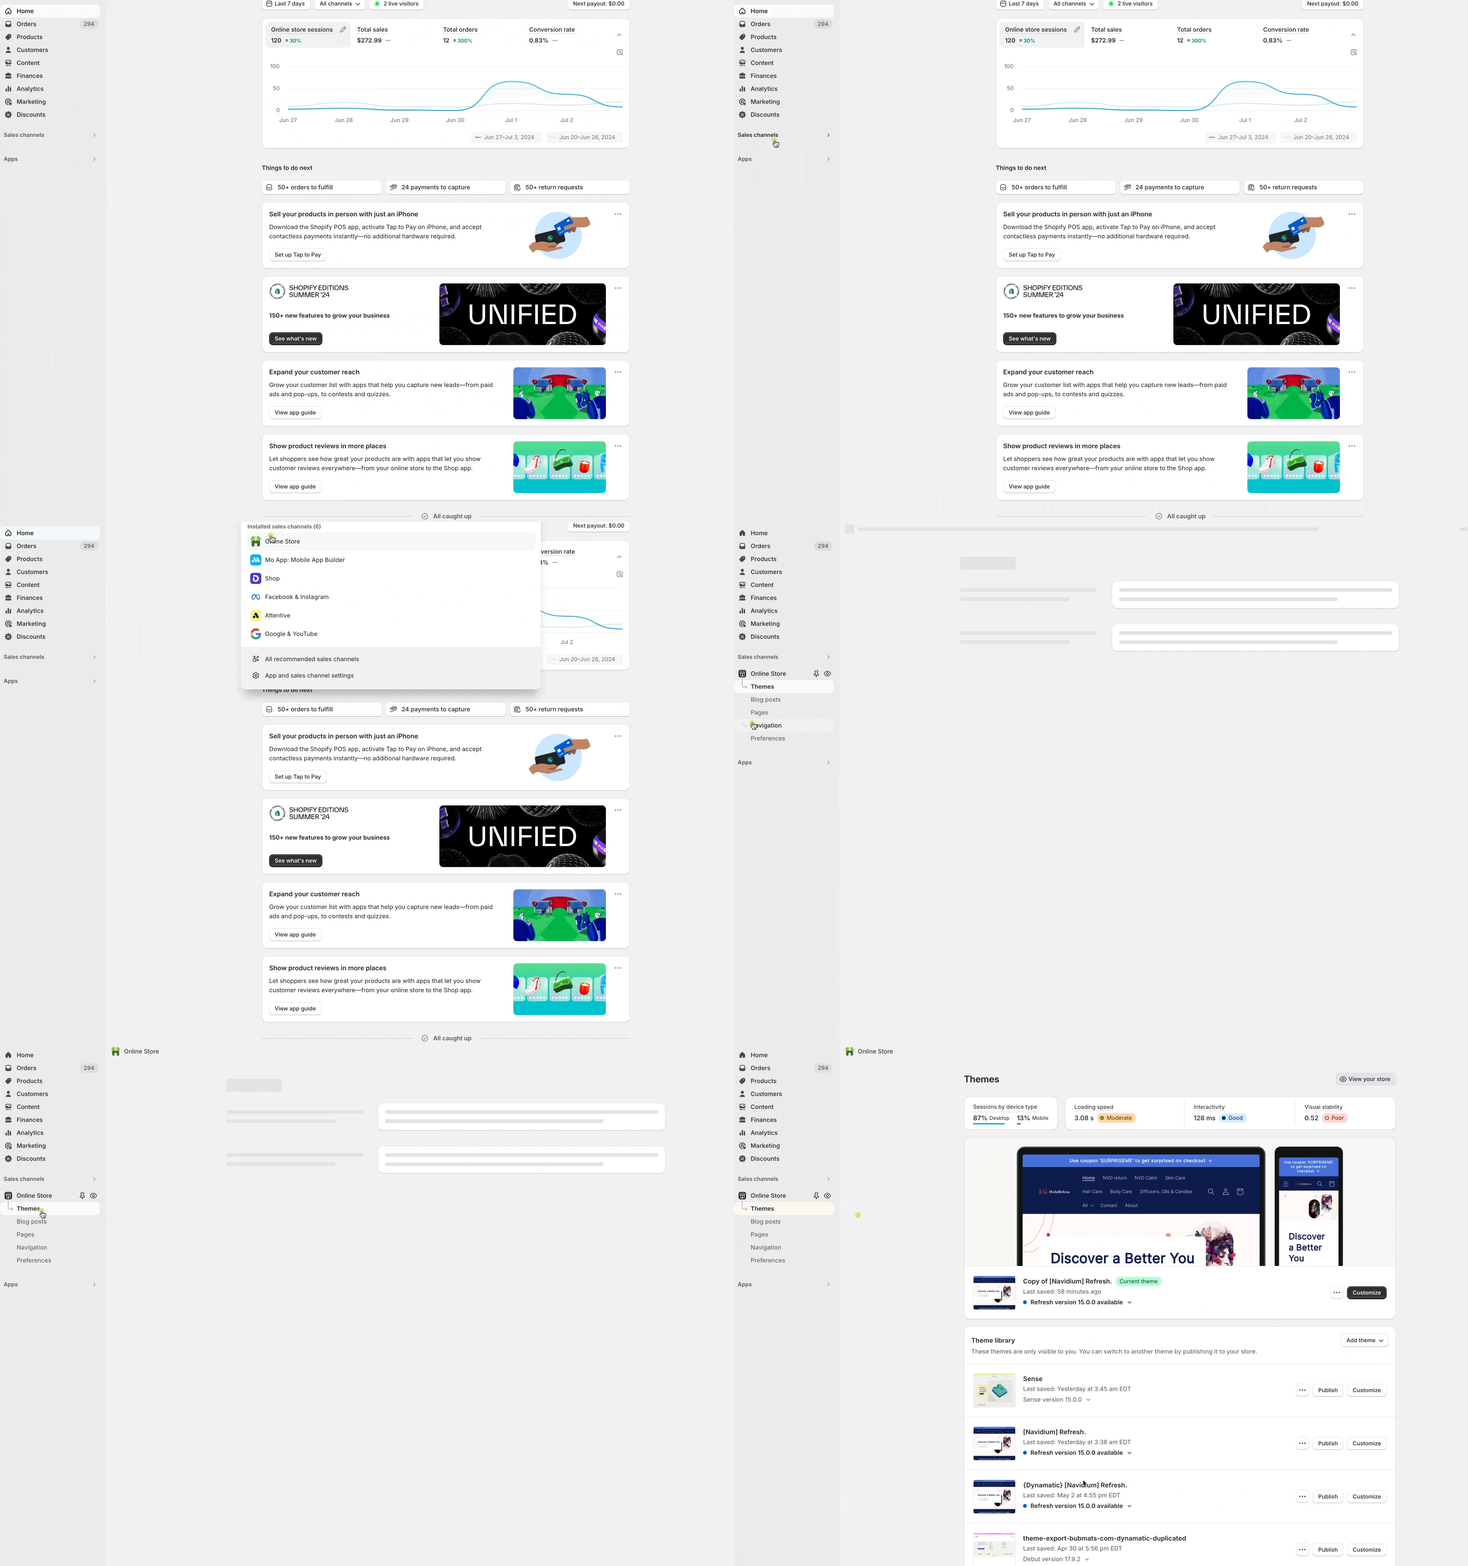
Step 2: Duplicate the live theme. You do this by clicking the button to the left of "Customize" with the "..." and selecting "Duplicate" from the drop down.
NOTE: The live theme is always the top theme usually displayed with a preview large window above the theme Name and theme thumbnail. It also has a small green bubble to the right of the theme name saying "Current Theme"
Tip: I like to rename the duplicate theme with an easy to remember indicator like {Dynamatic} Theme Name so that I know what that duplicate is, and why I made it. 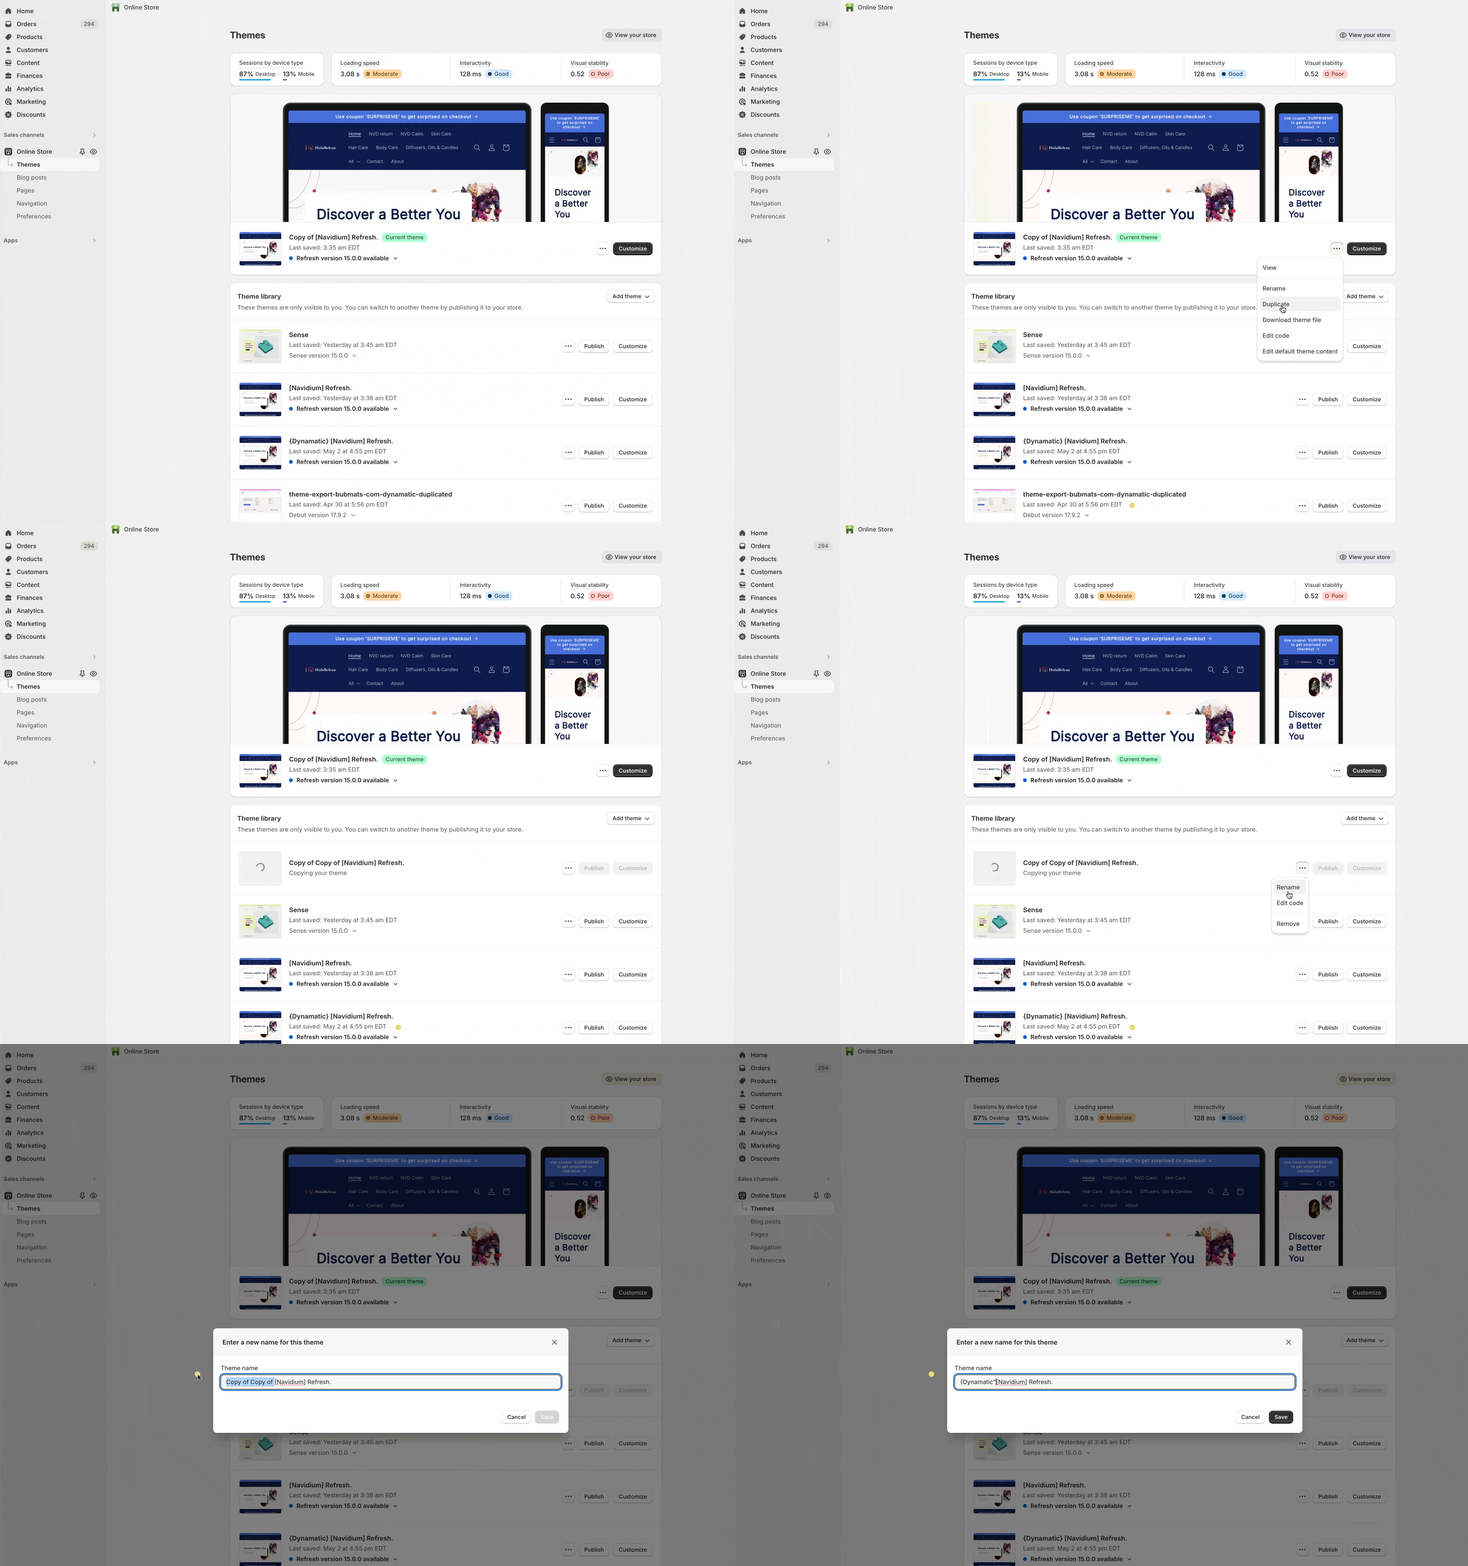
That's it! You have now duplicated the live theme, and as long as you make any changes in this theme only, nothing related to Dynamatic will show on your live theme at all.
Publishing the Duplicate Theme
Once you complete set-up and are happy with how everything looks, you may decide it is time to launch Dynamatic live on your store. Doing so is super easy by simply publishing the duplicate theme live. This will replace the live theme with the theme you edited to include Dynamatic Cart, Widgets, Zones, etc.
To publish a duplicate theme live, simply click the Publish button to the left of the "customize" button near the theme you want to publish.
Basic Installation Guide
Also note: Since so many themes are built differently, this guide might not be comprehensive enough or fully support your theme. You may experience styling bugs, or other issues. Please reach out to us, our team will support you fully and resolve any issues that come up!
Step 1: Enable the Dynamatic Theme App Extensions
As part of Shopify's latest requirements and framework, we don't add or inject any code directly into your theme on installation. We utilize theme app extensions for both managing and collecting data as well as injecting any additional code into your store to enable the cart or widgets to run.
This means, your live store is always safe and free of any of our code when you first install, and will only activate when you turn on the Dynamatic theme app extensions in the theme you want them to be in.
To enable Dynamatic App, visit your theme (hopefully the duplicate theme), and turn on the following Theme App Extensions:
> Dynamatic App
This controls the script for managing audiences and keeping track of site user behavior.
> Dynamatic Cart Lite
This controls the Dynamatic Slide cart draw.
You do this by clicking "customize" which will take you to the theme editor in shopify's admin. 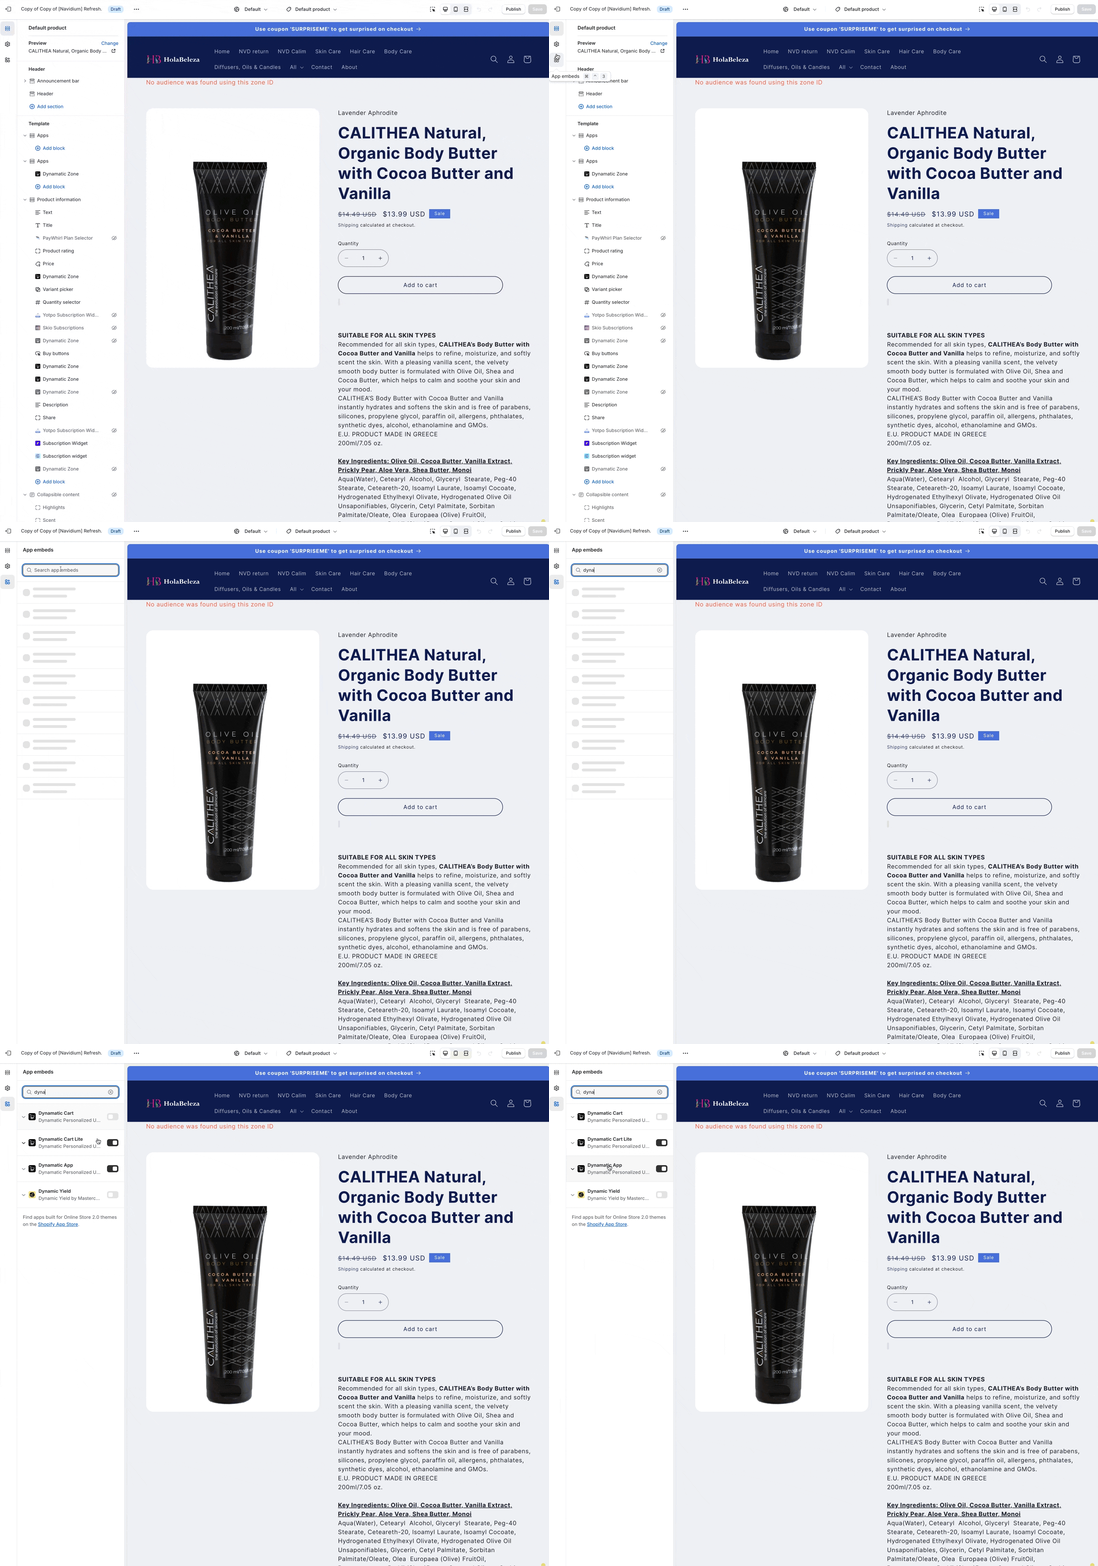
This will now enable the Dynamatic cart on your store, as well as the script for tracking site usage and behaviors to use in Audiences!
Step 2: Enable Cart
Once you've completed Step 1, it is time to begin designing the shell of the cart. Simply put, our slide out cart draw is an amazing way to increase Average order value, and boost your conversion rate. The cart is speedy quick, and has the ability to add multiple widgets to the cart.
Step 1 above does not enable the cart automatically. You do this by turning on the cart!
Head over to our app backend, and click on Settings > General. This is where all our general app settings live, including where you customize your cart, and enable it.
First enable the slide cart: 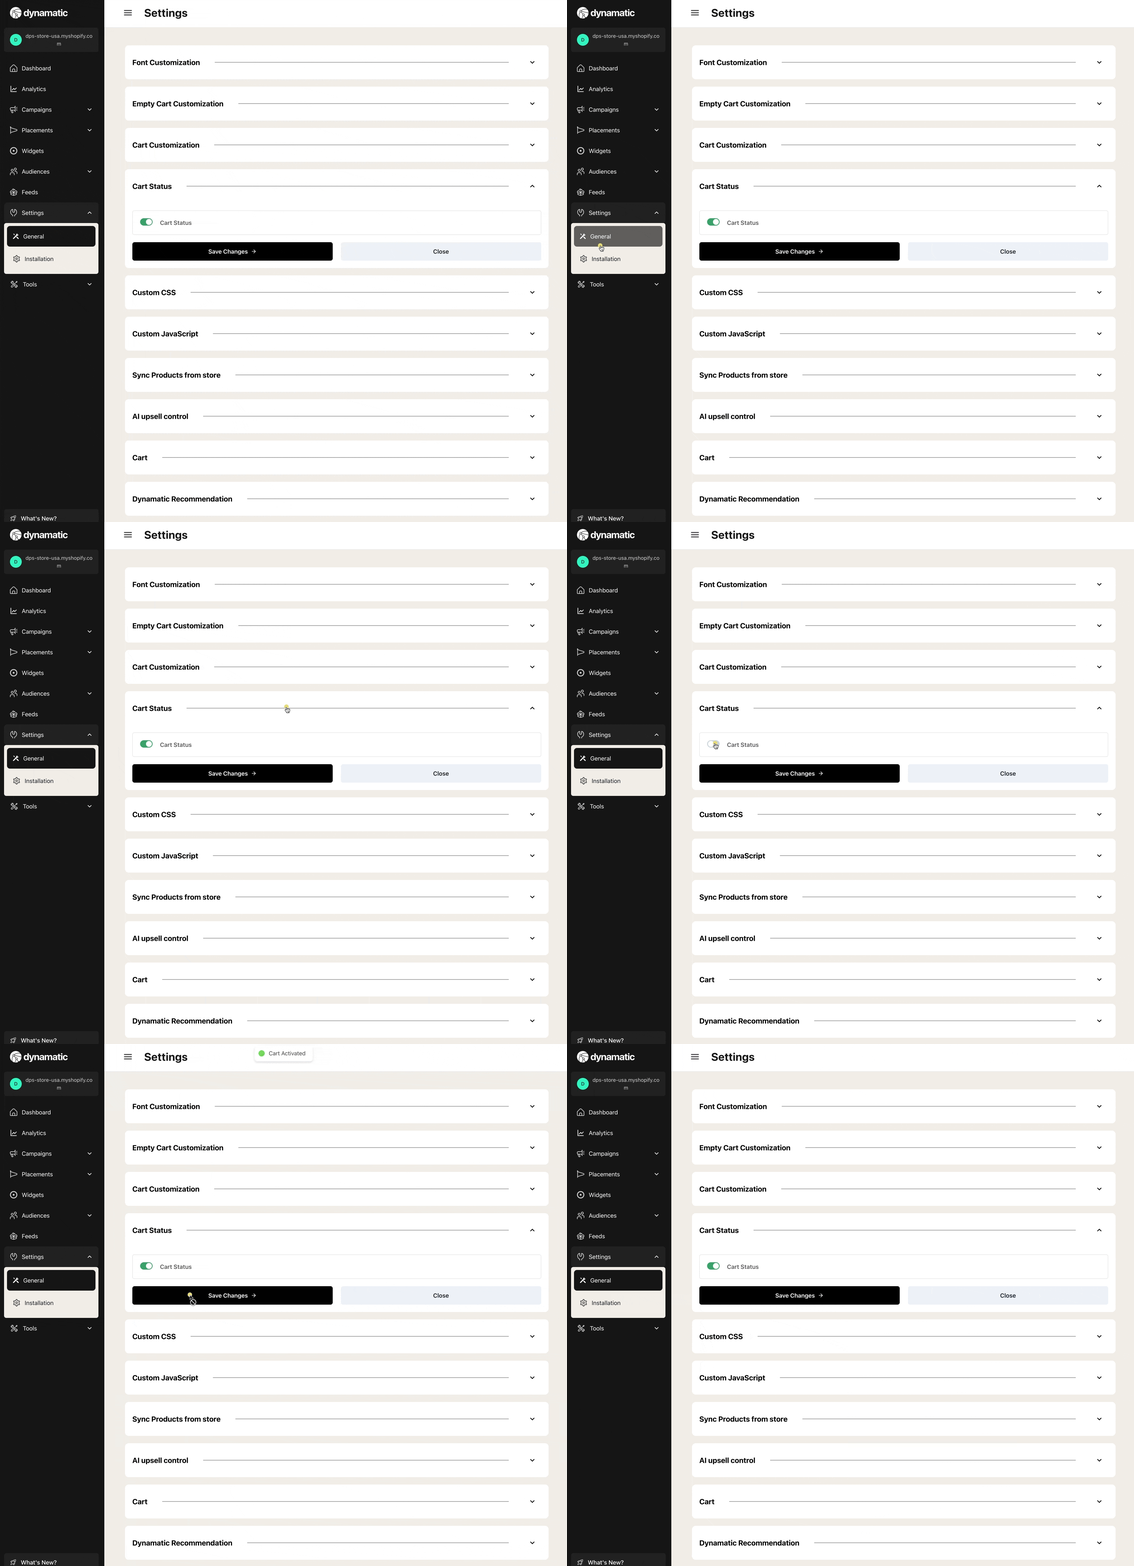
Now you are ready to begins styling the cart!
Step 3: Add custom fonts!
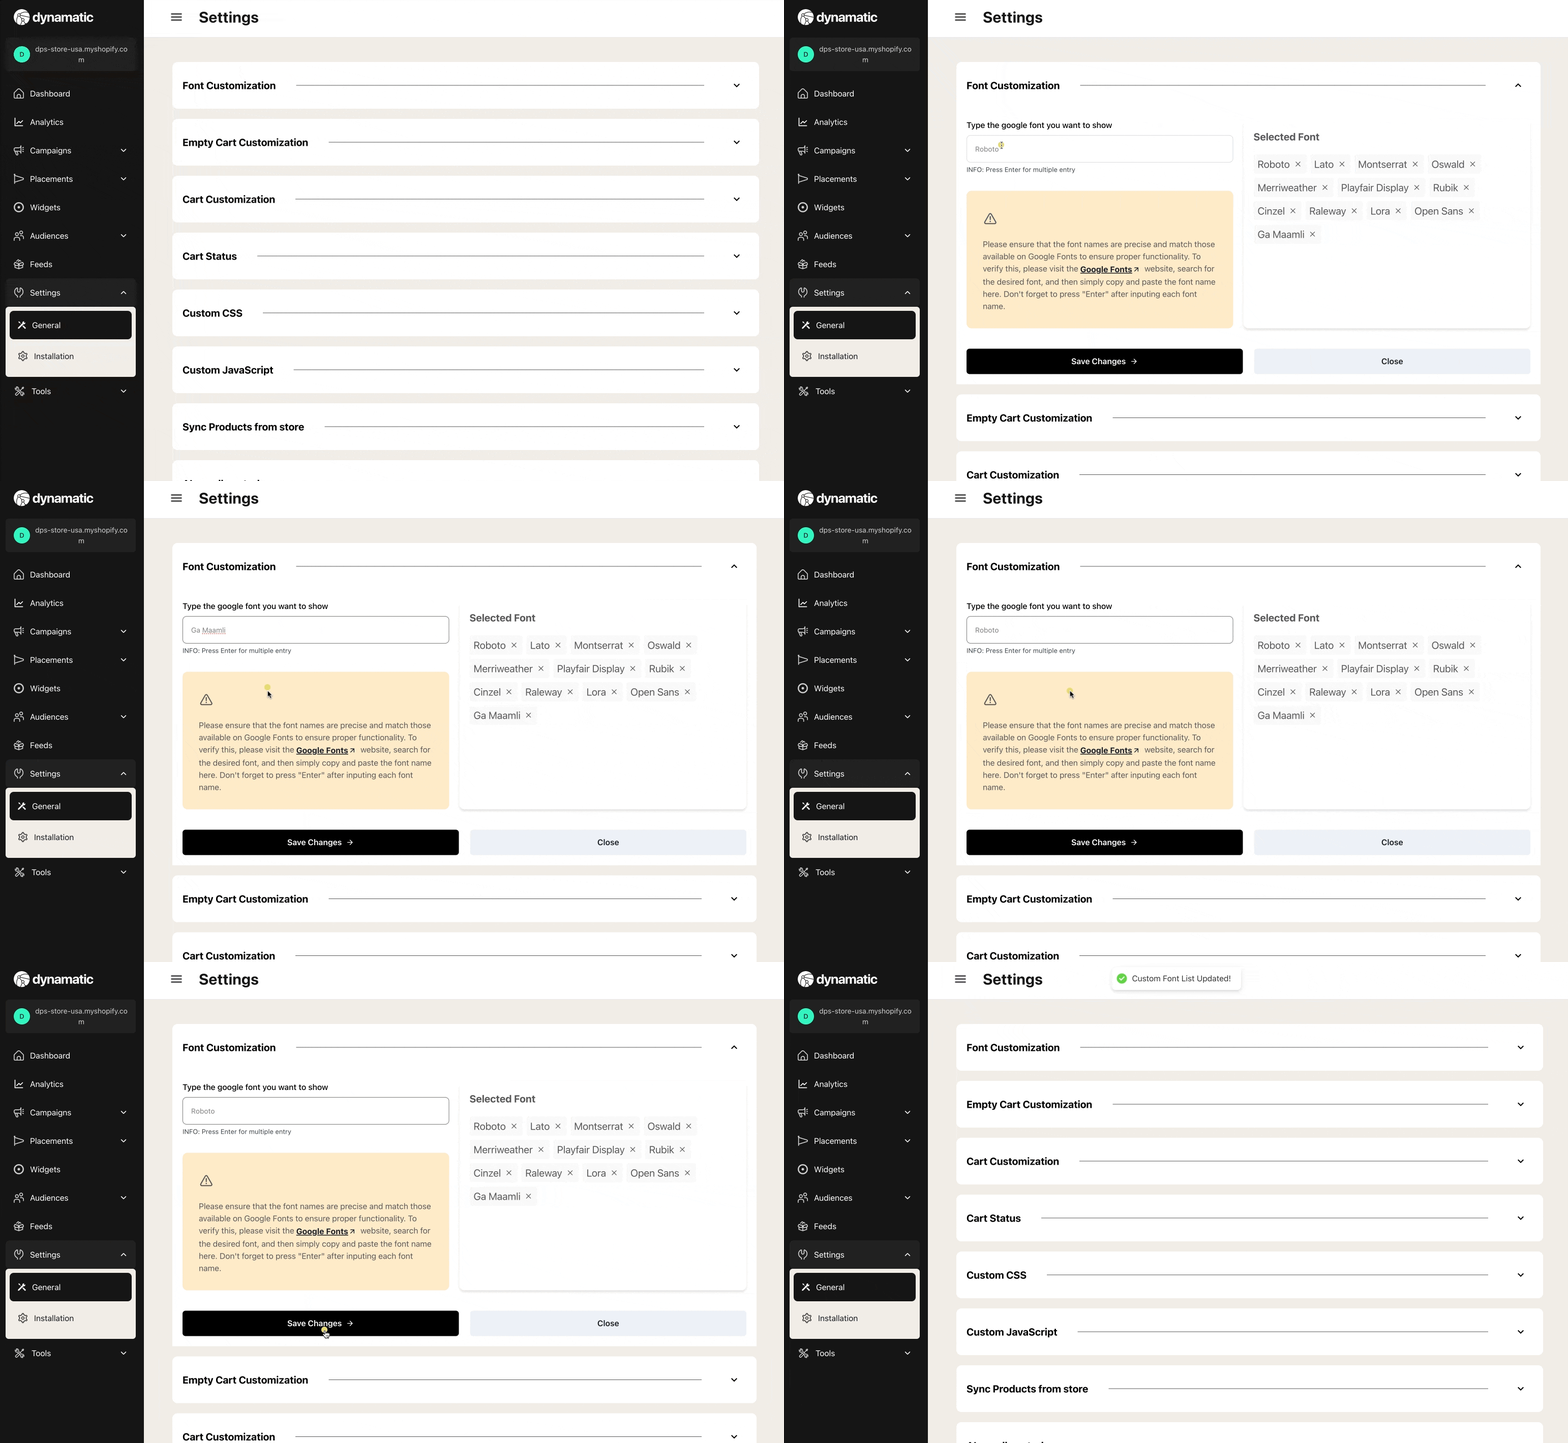
Before you begin styling widgets or even the cart shell, you'll want to be ready and make sure you have any custom fonts integrated with Dynamatic App so that you can achieve that perfect look and feel!
We currently support all Google Fonts, and can support other font types like Adobe etc, upon request. If you use a custom font that is not currently supported by Google fonts, please reach out to us via support@dynamaticapp.com
Select the "Font Customization" section of the General Settings, and then simply type the name of the font exactly as it is displayed by Google Fonts.
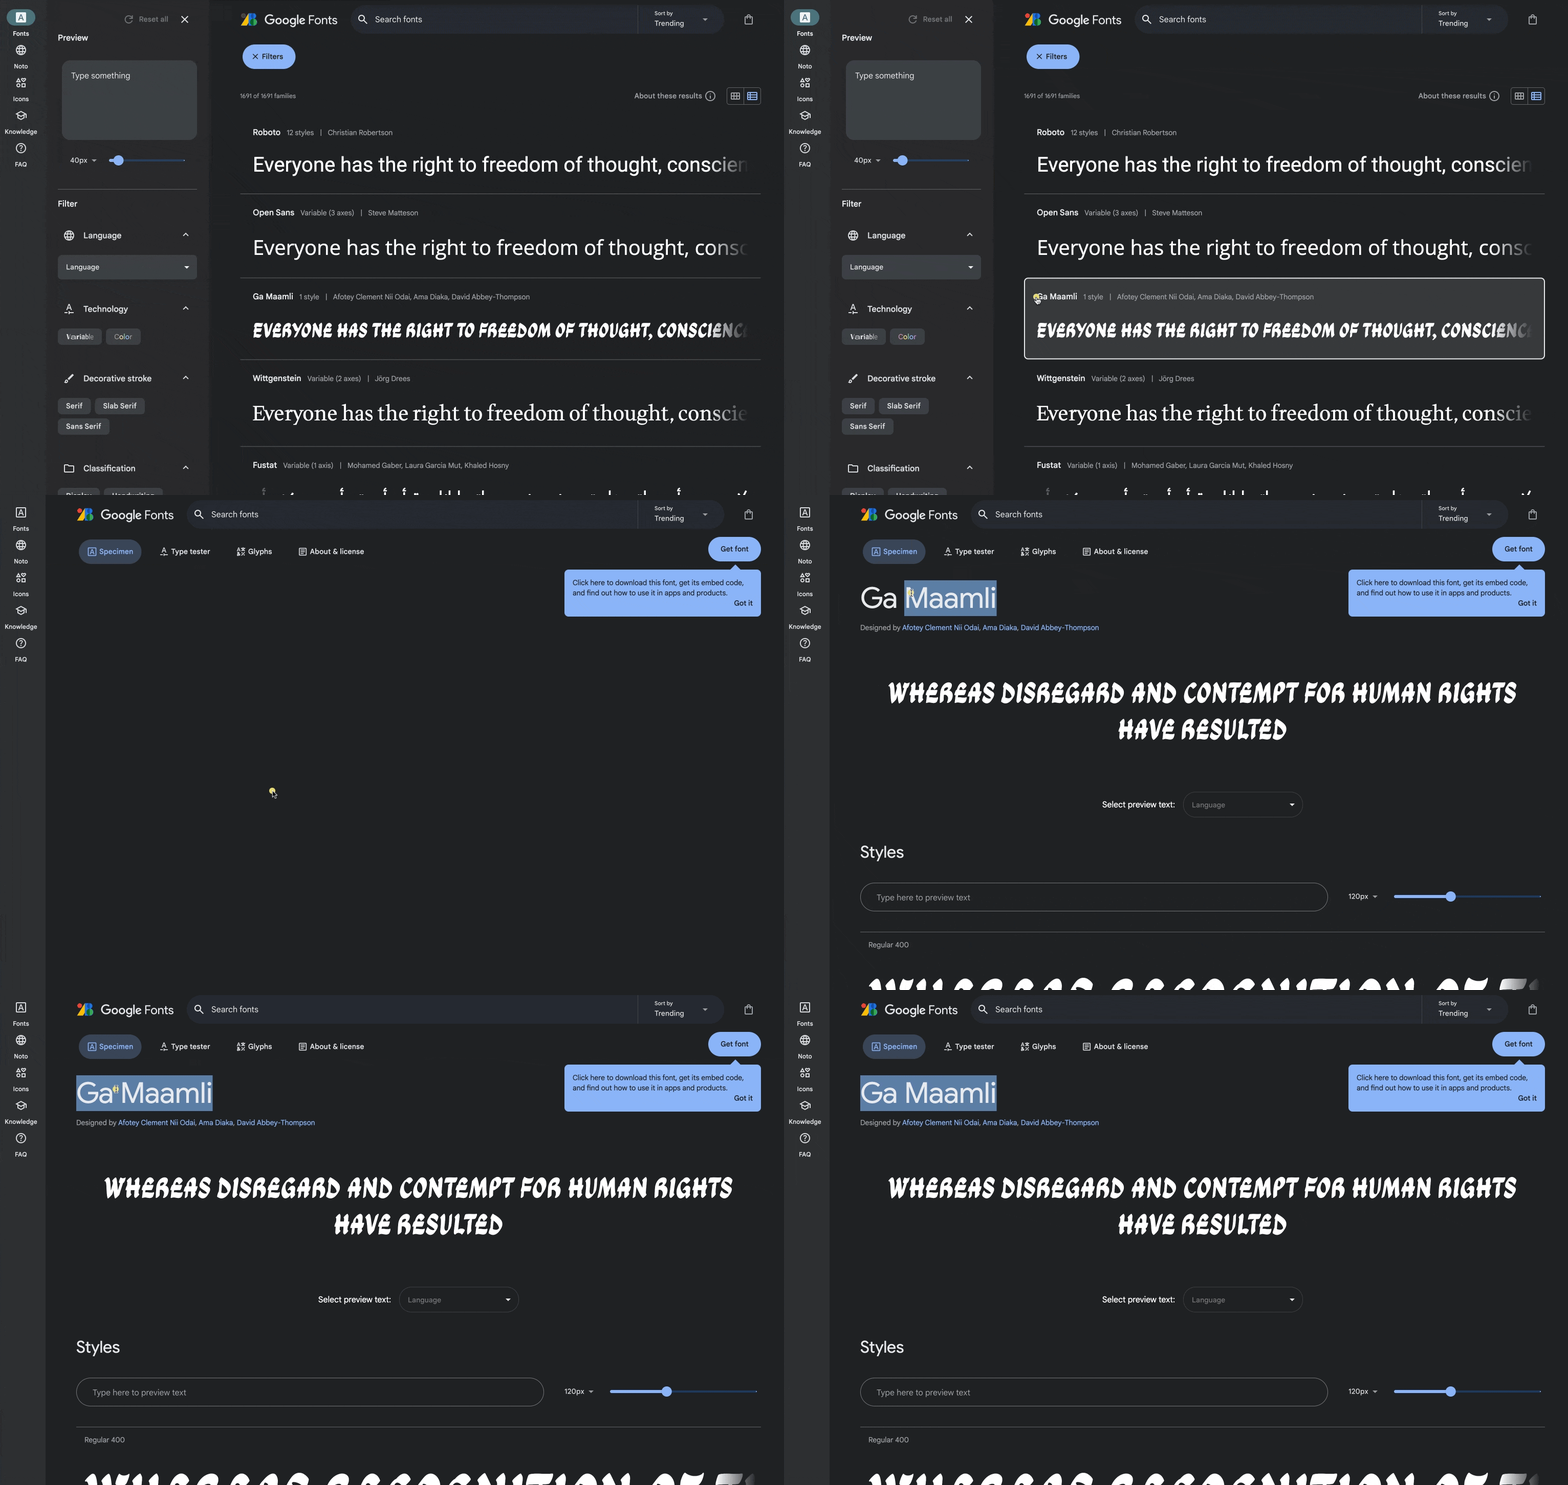
To find the exact name of a Font as required by Google Fonts, simply visit the google fonts site, and copy past the Font Name.
Step 4: Sync Products
For Dynamatic App to be able to allow you to create audiences, feeds, and widgets based on Products, we need to sync over your products and collections to our app! Head over to the General settings and look for the "Sync Products from Store" section and press the start sync button!
Note: Larger catalogs may take some time to complete a full sync! 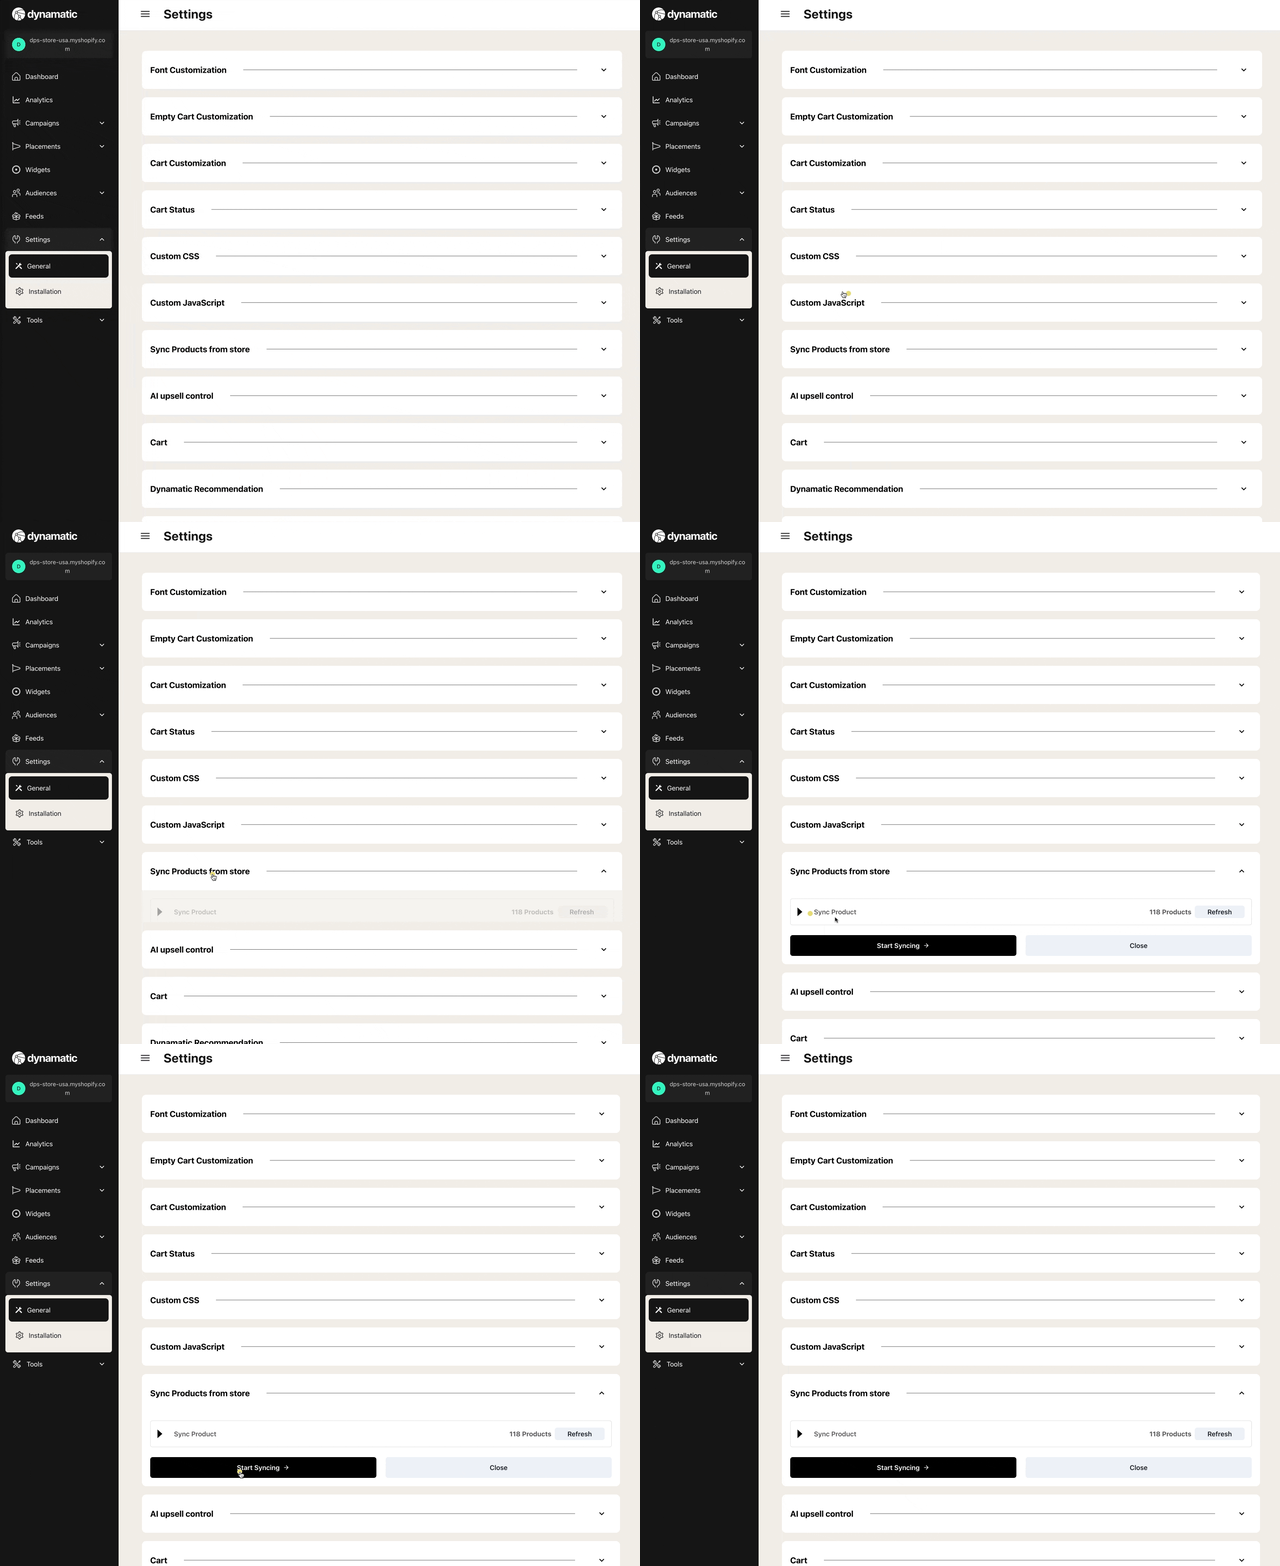
Once you have completed the above steps, you are now ready to move on to Styling & Customizing your cart!


