
Add-Ons Bundle
The Add-ons Bundle is your go-to tool for turning a single-item purchase into a higher-value order — without any friction. By surfacing complementary products directly on the product page, it creates a natural "Complete the look" or "You might also need" moment right where buying intent is highest.
Where It Works: Product Page (inline block or pop-up on Add to Cart).
Concept & Usage
What it is: A product-page widget that suggests curated add-on items alongside a main product, letting customers include them in their cart instantly — no extra navigation required.
Best For: Increasing AOV through low-effort impulse buys — think warranties, gift wrapping, accessories, or any item a customer would naturally pair with their purchase.
Key Features
Automatic Placement Once configured, the add-ons widget appears automatically on whichever product pages you designate as triggers. No manual placement needed per page.
1-Click Add to Cart Customers can select and add upsell items without leaving the product page, keeping the purchase flow smooth and uninterrupted.
Preselected Add-ons You can define which add-on items are checked by default, making it easier for customers to accept the offer without any extra action.
Variant Selection Optionally allow customers to choose their preferred variant (size, color, etc.) for each add-on item directly within the widget.
Display Flexibility Choose between two display modes to match your storefront layout:
Inline block on the main product page
Pop-up triggered after the customer clicks Add to Cart
How to Configure
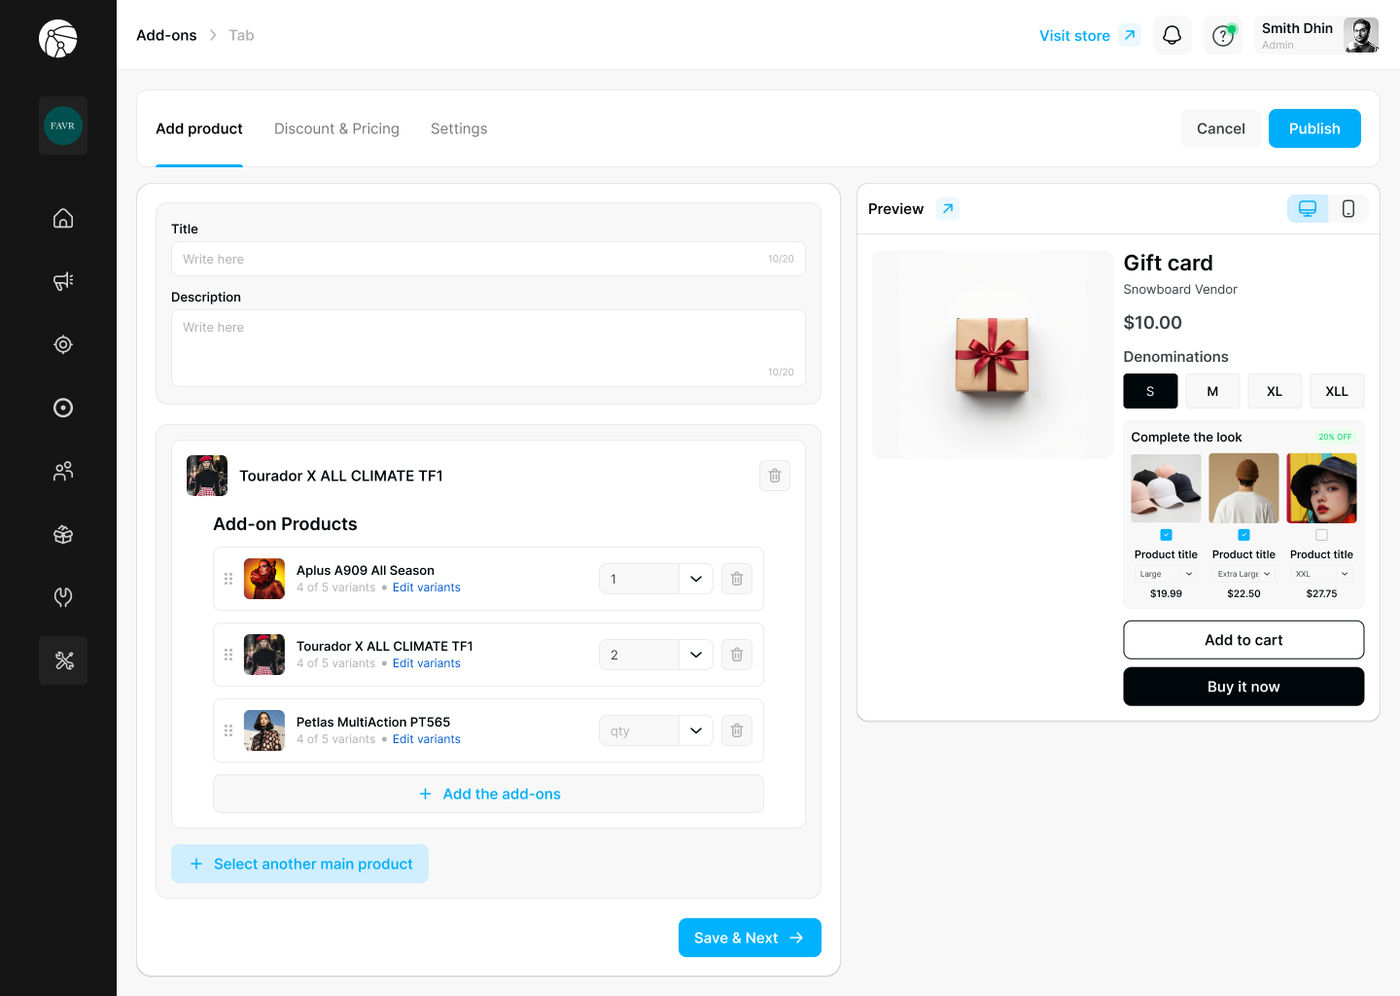
Step 1 — Add Product
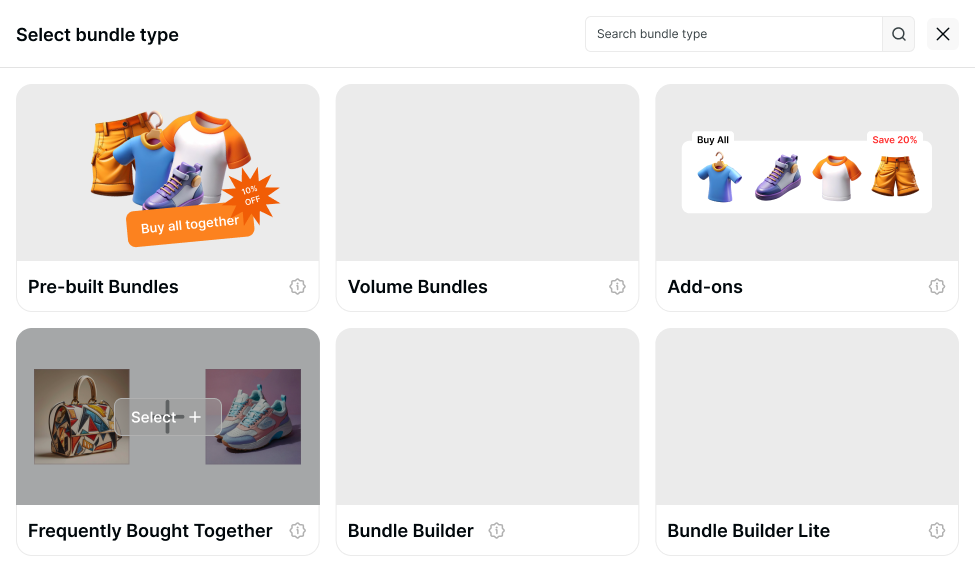
Navigate to Bundles and click Create bundle.
Select Add-ons as your bundle type.
Enter a Title and optional Description for the bundle (shown on the storefront widget).
Under the main trigger product, click + Add the add-ons to select the complementary items you want to offer.
Set a quantity for each add-on, or leave it adjustable by the customer.
Click + Select another main product if you want this bundle to appear on multiple product pages.
Click Save & Next to proceed.
Step 2 — Discount & Pricing

Select a Main item (the trigger product the discount will be tied to).
Choose a Discount type:
Percentage — e.g., 20% off the add-on item
Fixed Amount — a flat dollar reduction
Set Price — override the add-on's price entirely
Enter the discount amount.
Repeat for additional main items if needed.
Click Save & Next.
Step 3 — Settings
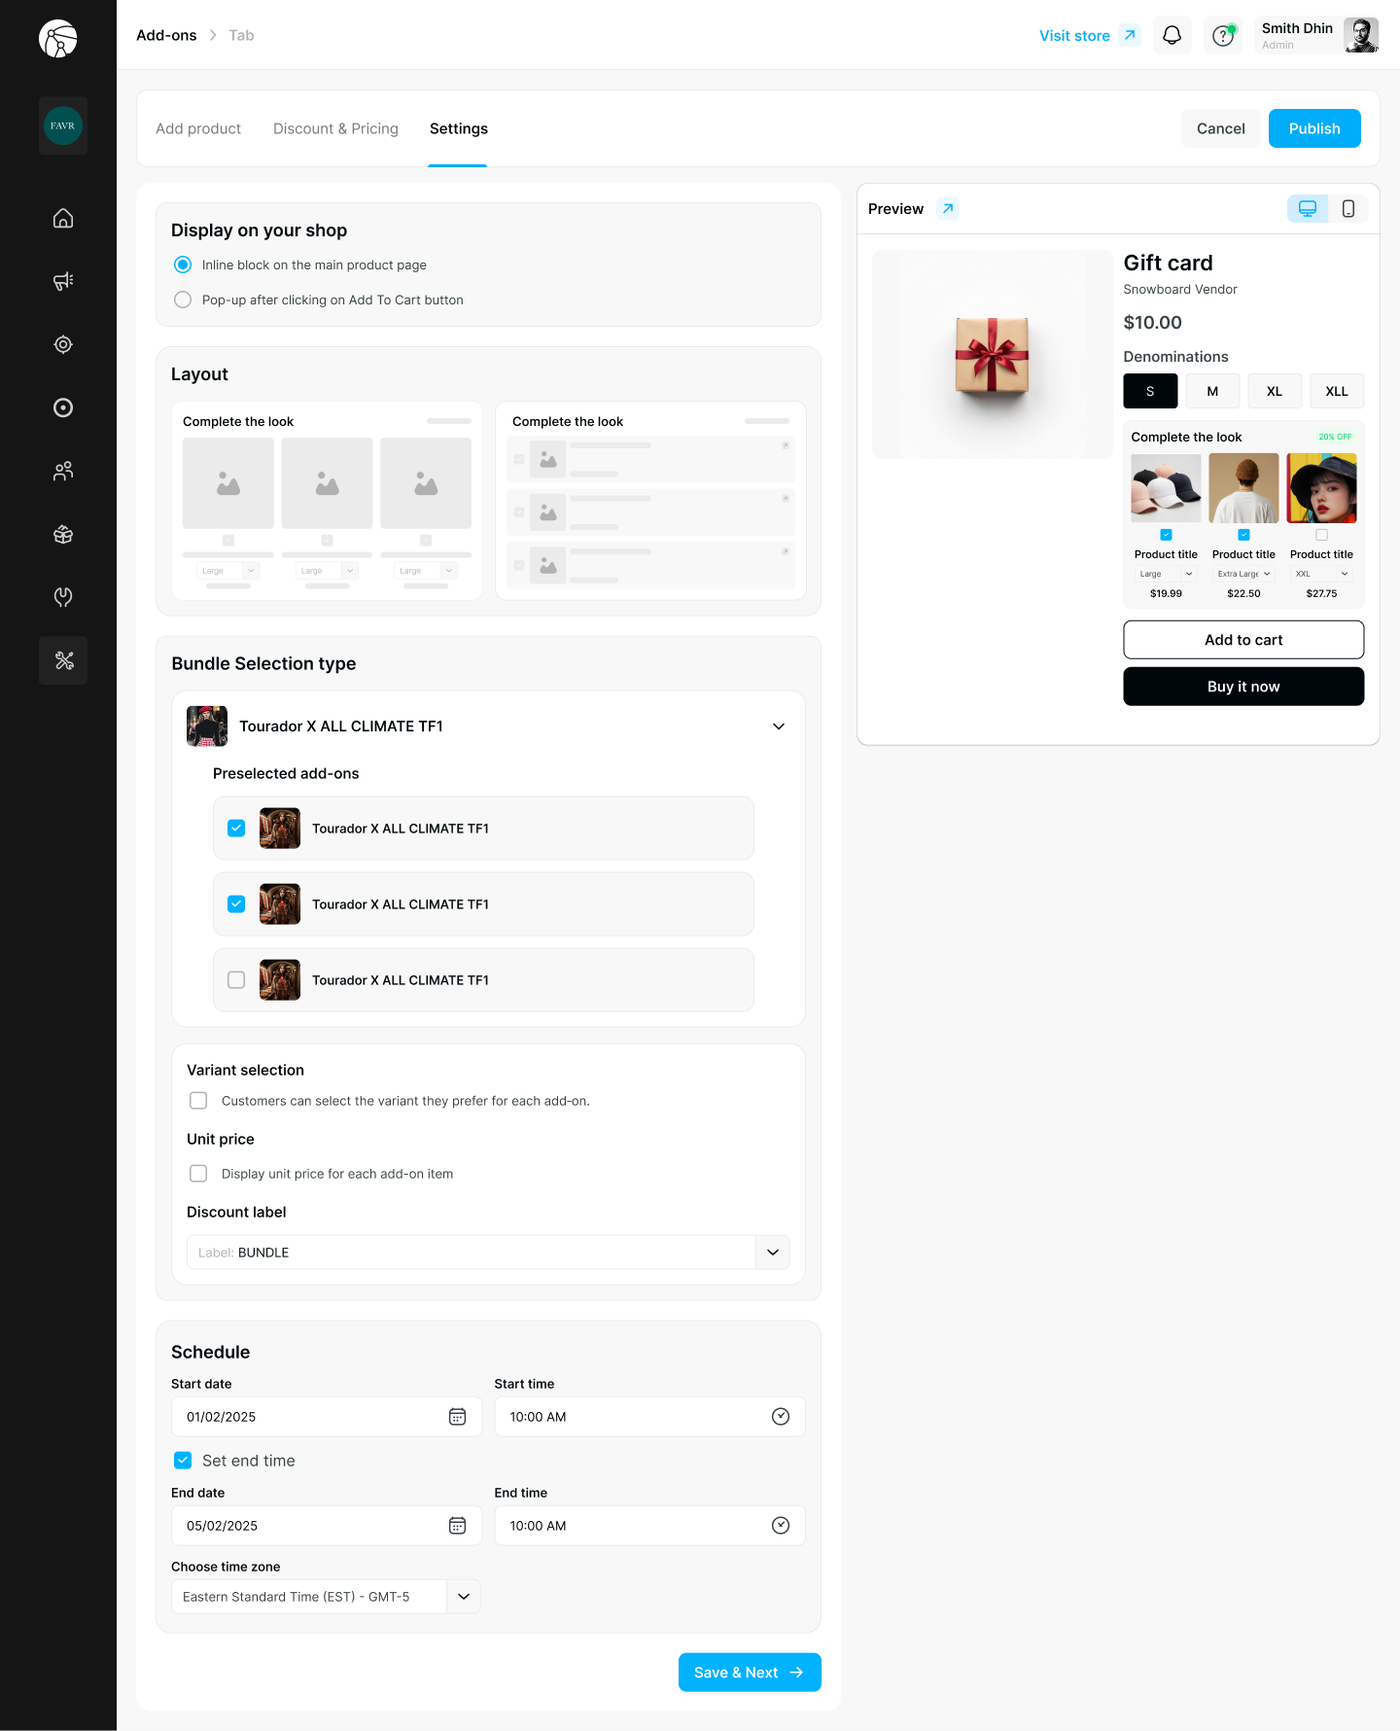
Fine-tune how the widget appears and behaves:
Setting | Description |
Display on your shop | Choose Inline block (always visible on the page) or Pop-up (appears after Add to Cart is clicked) |
Layout | Select a grid or list layout for the add-on items |
Preselected add-ons | Check which items are selected by default when the widget loads |
Variant selection | Enable to let customers choose a variant per add-on |
Unit price | Toggle on to display individual item prices within the widget |
Discount label | Customize the label shown on the discount badge (e.g., "BUNDLE", "SAVE") |
Schedule | Set a start and end date/time + time zone to run the offer for a limited period |
Click Save & Next, then hit Publish to make the bundle live.
Storefront Preview
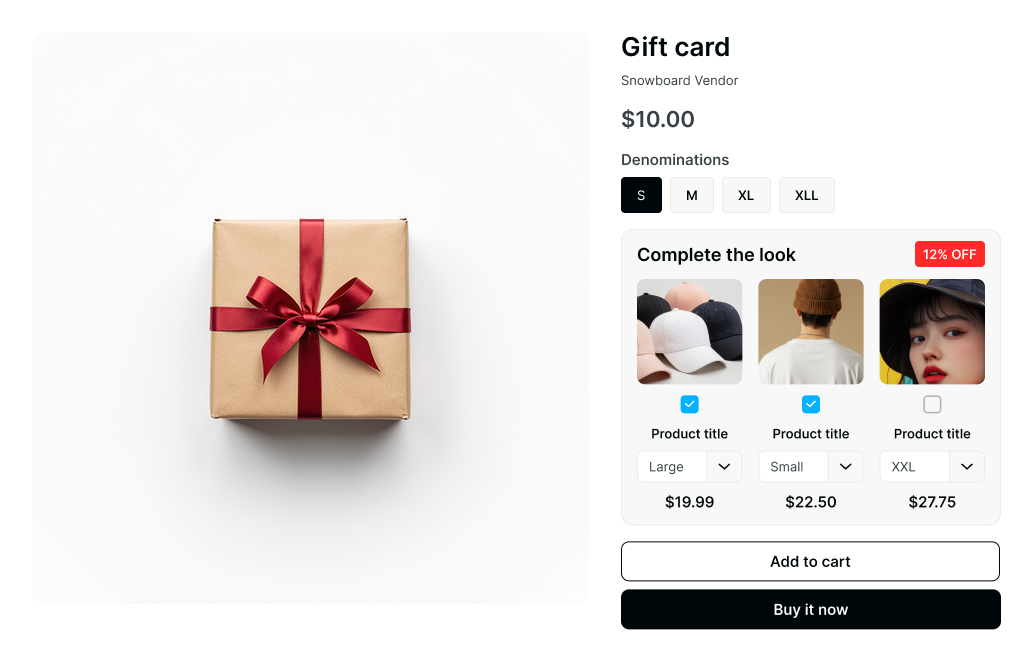
Once published, customers will see a "Complete the look" (or your custom title) section on the product page, showing the add-on items with checkboxes, variant dropdowns, individual prices, and a discount badge — all without leaving the page.
⚠️ Before You Publish
Ensure the Dynamatic Bundles app embed is toggled ON in your Shopify Theme Editor, or the widget will not appear on your storefront.
Use the built-in Preview (desktop and mobile views) to confirm the layout looks correct before going live.
If you switch Shopify themes, you must re-enable the app embed on the new theme.