
Product Options
The Product Options tool in the Dynamatic App is a powerful feature designed to enhance your storefront by adding customizable fields and choices to your products. This tool allows you to create complex product configurations, such as size selections, material upgrades, or add-on services, while managing pricing adjustments and conditional logic.
The main landing page for Product Options provides a high-level view of all your existing option sets.
Option List: Displays the Name, Creation Date, and Last Update Date for each set.
Status Management: Toggle options between Active (visible on store) and Draft (hidden).
Product Links: The "View" link under the Products column shows which items are currently associated with that option set.
Actions: Use the toggle to quickly enable/disable or the meatball menu (three dots) to edit or delete a set.
Global Search & Filter: Quickly find specific option sets using the search bar or filter by status (All, Active, Draft).
Creating a New Option Set
To begin, click the + Create button in the top right corner of the dashboard. The creation process is divided into three main tabs: Option, Rules, and Products.
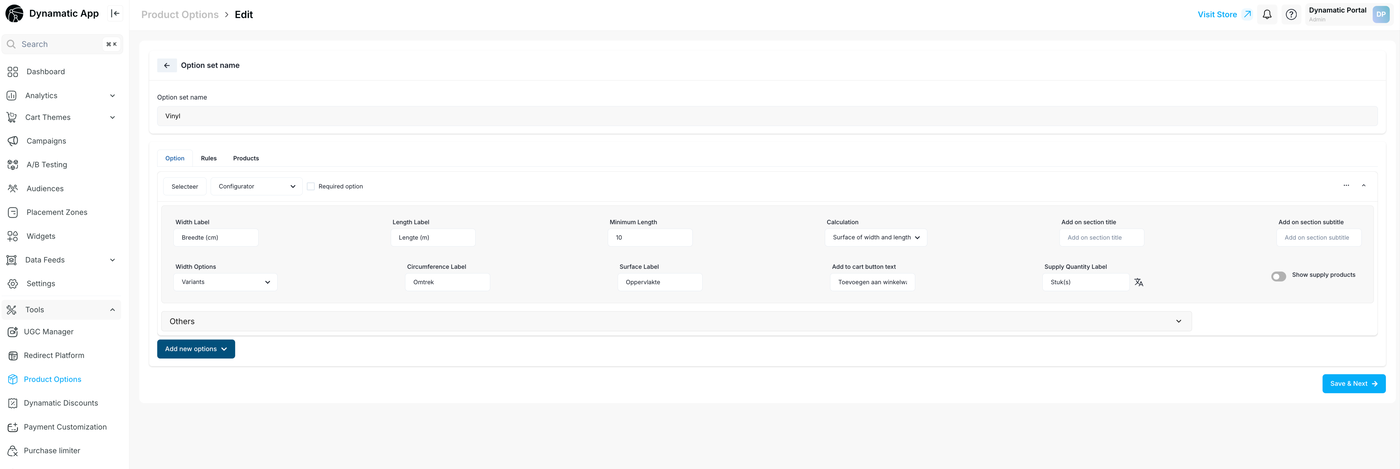
Step 1: Defining Options
In the Option tab, you define the actual fields your customers will interact with.
Option Set Name: Give your set an internal name (e.g., "Upholstery Upgrades").
Option Type: Choose how the option appears (e.g., Checkbox, Dropdown, Radio Buttons).
Required Option: Check this box if the customer must make a selection before adding the product to the cart.
Values & Pricing:
Value Title: The label the customer sees (e.g., "Premium Leather").
Price Adjustment: Choose to Increase Price, Decrease Price, or keep it as Change Price (Flat rate).
Add-on Product: Link a specific SKU to a value so that selecting the option also adds a related item to the cart.
Default Value: Set a specific choice to be pre-selected when the page loads.
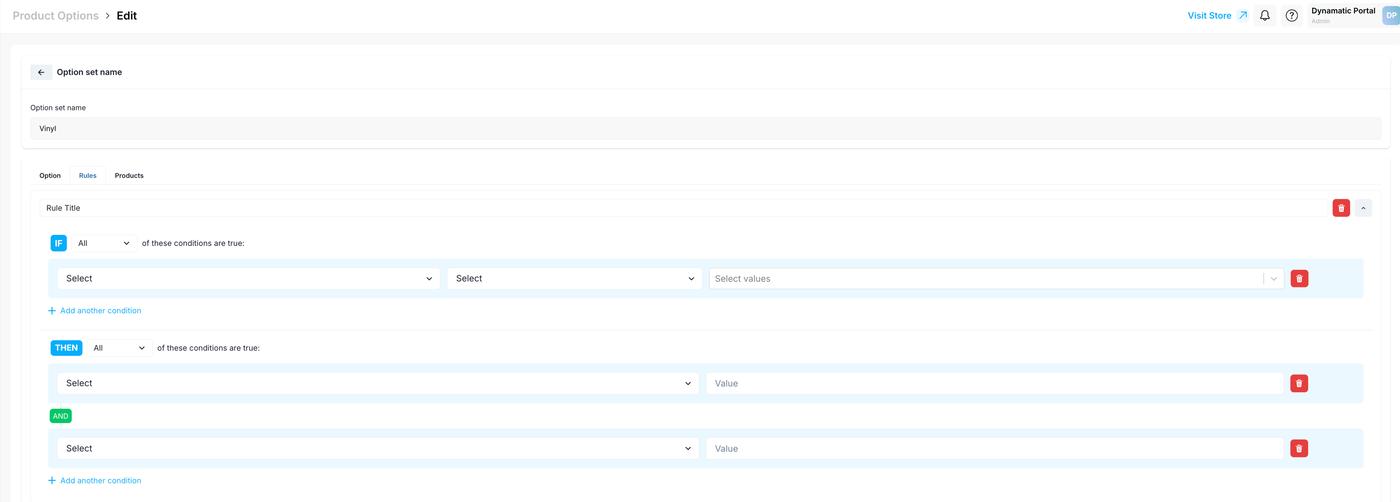
Step 2: Setting Up Rules (Conditional Logic)
The Rules tab allows you to create "If/Then" scenarios to make your product pages dynamic.
Conditions (IF): Define the trigger. For example: If "Option A" is "Value X".
Actions (THEN): Define what happens. For example: Then "Show Option B" or "Hide Option C".
Multiple Conditions: Use the AND logic to create complex dependencies (e.g., If Color is Red AND Size is Large, then show a specific "Extra Shipping" notice).
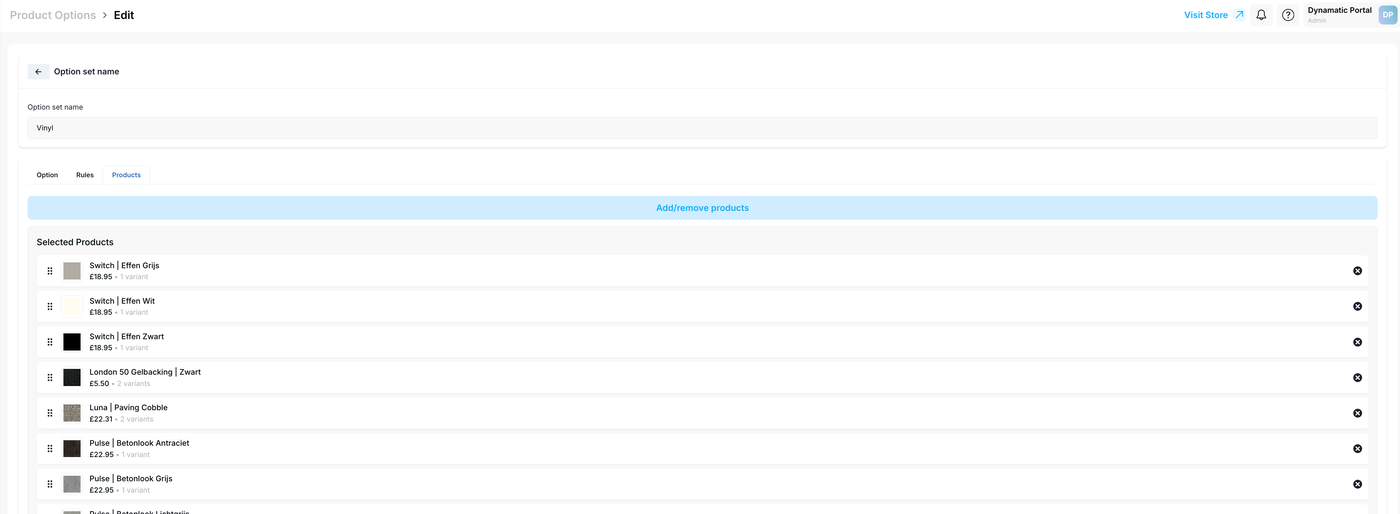
Step 3: Assigning Products
The final step is determining which products in your store will display these options.
Selection Methods: You can add products:
By Products: Individually select specific items from your catalog.
By Collections: Automatically apply options to every product within a specific category (e.g., "All Sofas").
By Feeds/Tags: Use existing tags or data feeds to bulk-assign options.
Review: The "Selected Products" pane on the right side of the modal ensures you can verify your list before hitting Save & Submit.
Best Practices
Internal Naming: Use clear names for your Option Sets so you can easily identify them later in the dashboard.
Logic Testing: After setting up complex Rules, always visit your "Visit Store" link (top right) to ensure the conditional logic flows correctly for the end-user.
Draft Mode: Keep new sets in Draft status while you are still adding values and rules to prevent customers from seeing unfinished configurations.