
05.1 Setting up widgets on Post Purchase & Thank you page
If you want to place your widget on the post-purchase page, make sure that the widget is compatible with post-purchase placement. You can verify this in the Widget Gallery before enabling it in your Shopify checkout settings.
Go to your Shopify dashboard.
Click on Settings.
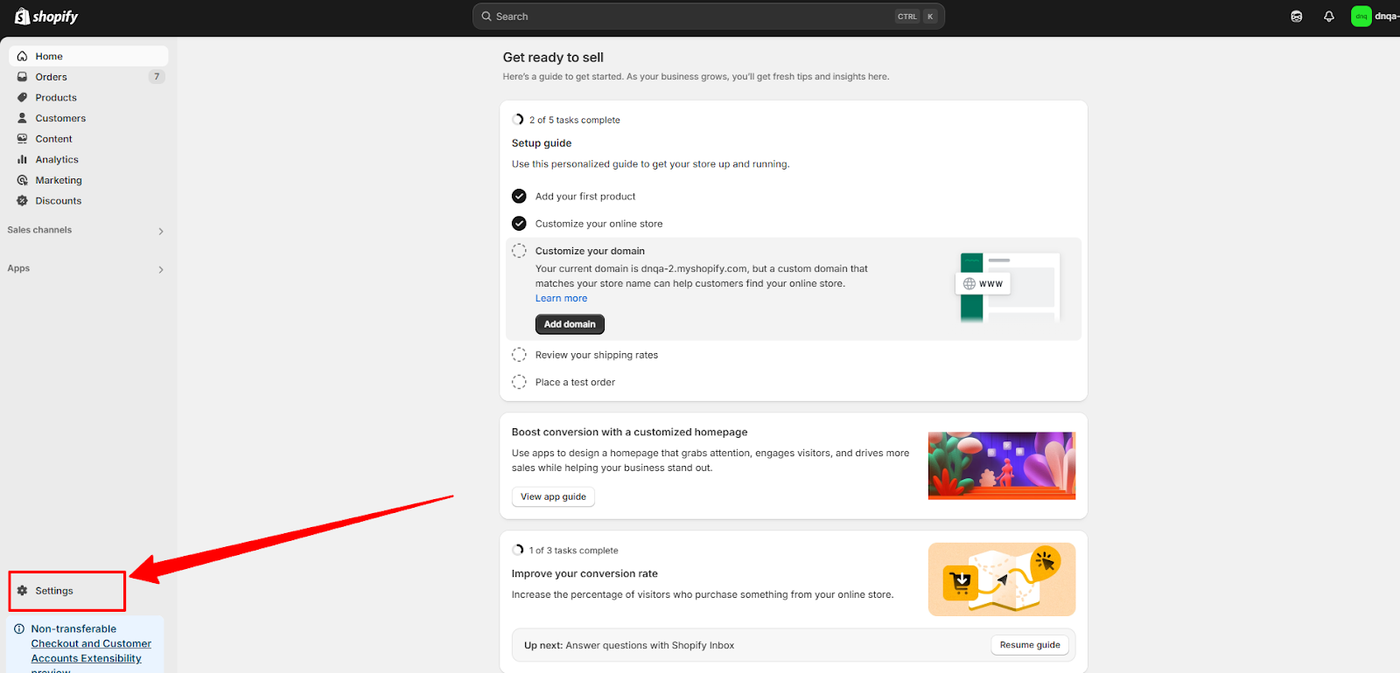
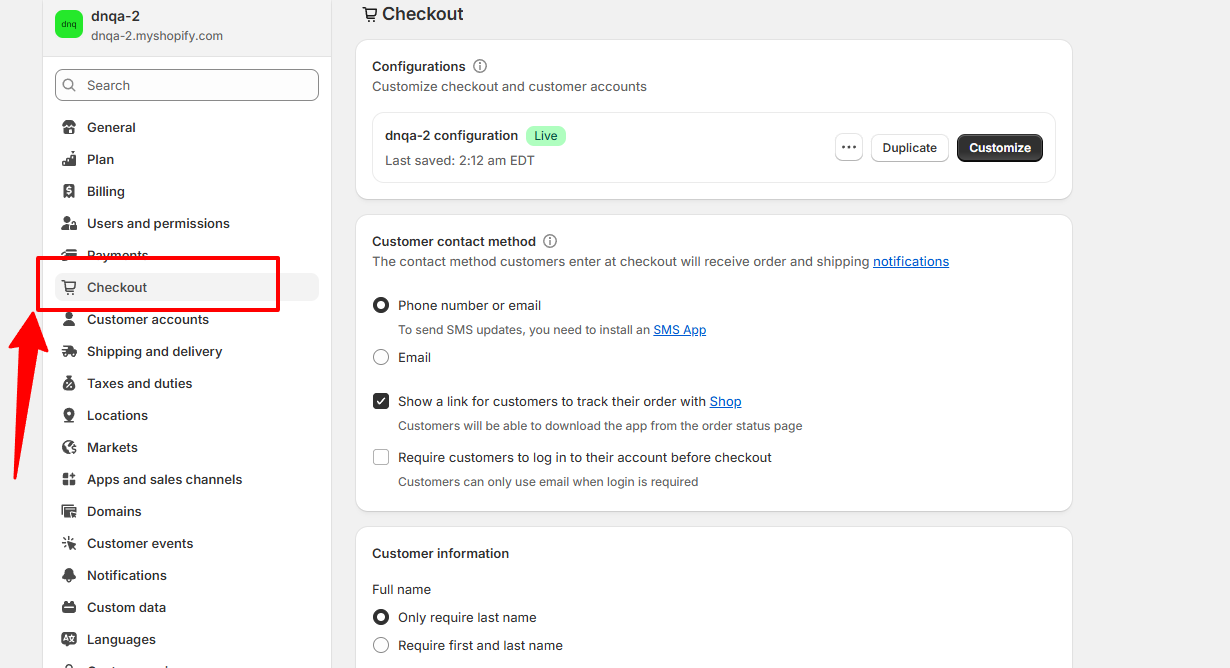
From your Shopify dashboard, click on Settings in the bottom-left corner, and then select Checkout from the menu.
This will take you to the Checkout settings page, where you can enable the post-purchase feature required for your widget to be displayed.
Enabling the Dynamatic App for Post-Purchase
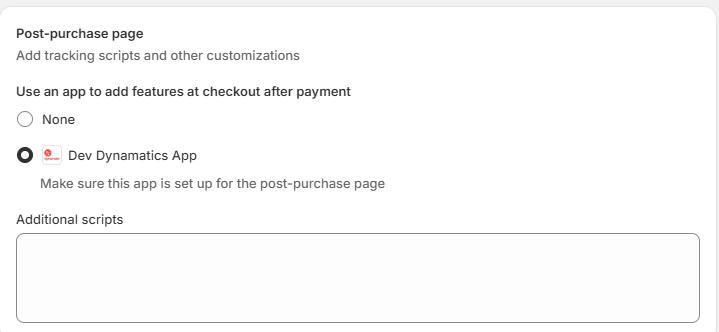
Once you are on the Shopify Checkout settings page, scroll down to the Post-purchase page section. Click the Add a post-purchase app button.
This will open a list of your installed apps. Select the Dynamatic app from the list to enable it on your post-purchase page. This is the final and crucial step that will allow your Single Variant Selector widget to be displayed after a customer's purchase.
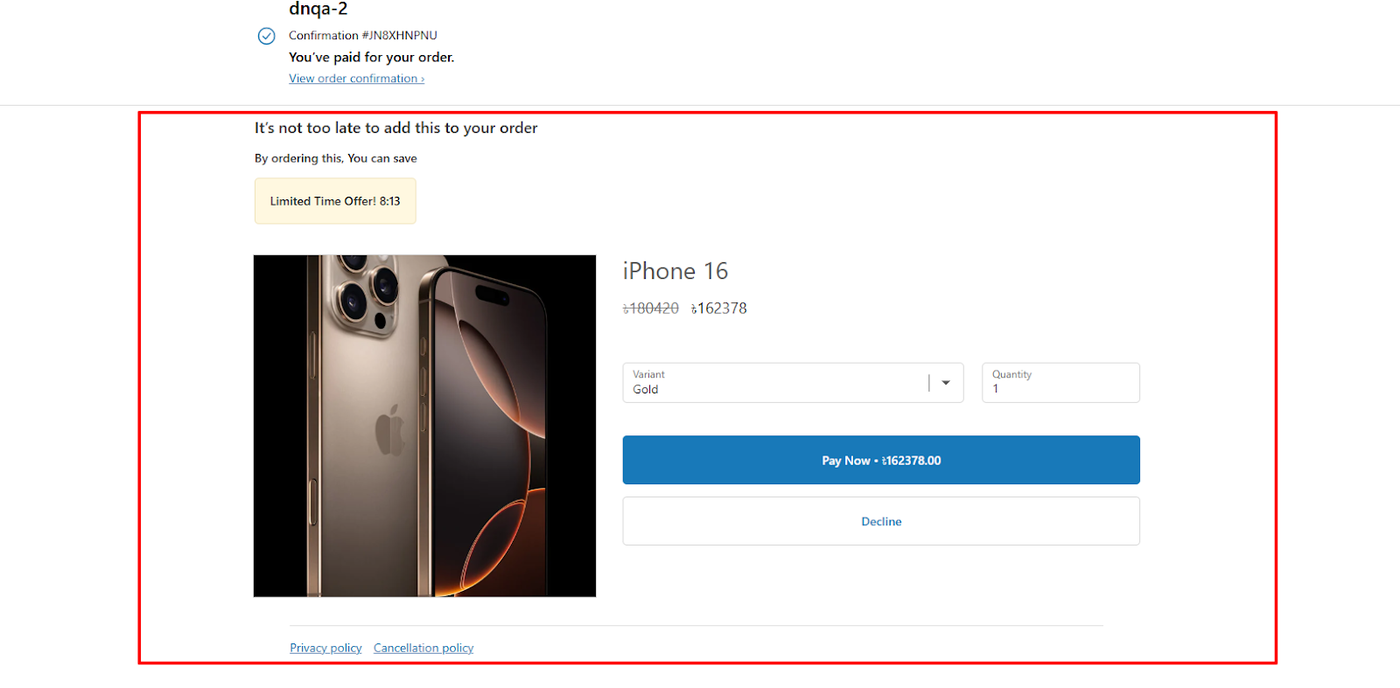
Once you have selected Dynamatic as your designated post-purchase app and saved your changes, the widget will automatically activate. It will now appear to customers on the live storefront immediately following the completion of their checkout.
Congratulations! Viewing Your Widget on the Storefront
You have successfully completed all the steps to create and publish a Single Variant Selector widget. Your campaign is now live and ready to display on your storefront.
To see the final result, go to your store and place an order for one of the trigger products you selected during the setup.
After you complete the checkout process, you will be taken to the post-purchase page, where your customized Single Variant Selector Widget will appear, allowing customers to add the upsell product to their order.
Thank you page widget setup
Navigating to the Thank You Page Editor
To access the editor for your post-purchase page, follow these steps:
Head to your Shopify theme editor.
At the top of the editor, find the page dropdown menu and select Checkout from the list.
Once you're on the Checkout page, click on the Checkout dropdown bar again.
From the options that appear, select Thank you.

Adding a Dynamatic Zone to the Thank You Page
Now that you are on the Thank you page editor, you will add a Dynamatic zone to your desired location. This will create a designated space for your widget on the page.
Navigate to the section where you would like your widget to appear.
Click on the Add block button or the + icon in that section.
From the list of available blocks, choose the Dynamatic App Zone.
This action will place the zone on your page, and you will be able to select the specific zone you created in your Dynamatic dashboard.
Linking and Saving Your Zone

After adding the Dynamatic App block, a form will appear where you can link the zone you created earlier.
From the dropdown menu, paste the specific zone ID you want to display on this page. Once you have pasted your zone, click Save Changes in the top-right corner of the editor.
This final step connects your Dynamatic zone to your Shopify Thank you page, ensuring your widget appears correctly on your storefront.