
Template Testing
A Template Test allows you to test one page, product, or collection template against another within your Live theme.
You have an existing product template and want to test adding new widgets, zones, or extra content blocks using native Shopify sections to see if they improve conversions. To do this, you simply duplicate your original product template in Shopify, add your new content to the duplicate, and use Dynamatic to test the original layout versus the new one.
How it works behind the scenes
Shopify's backend natively restricts assigning a single product to more than one template at a time. To solve this, Dynamatic uses client-side logic to split the traffic. When a user lands on the tested page, the app appends a URL parameter (like ?view=template-name) via JavaScript to instantly serve the alternate template to users in the test group.
Step 1: Setup (Metrics, Audience & Schedule)
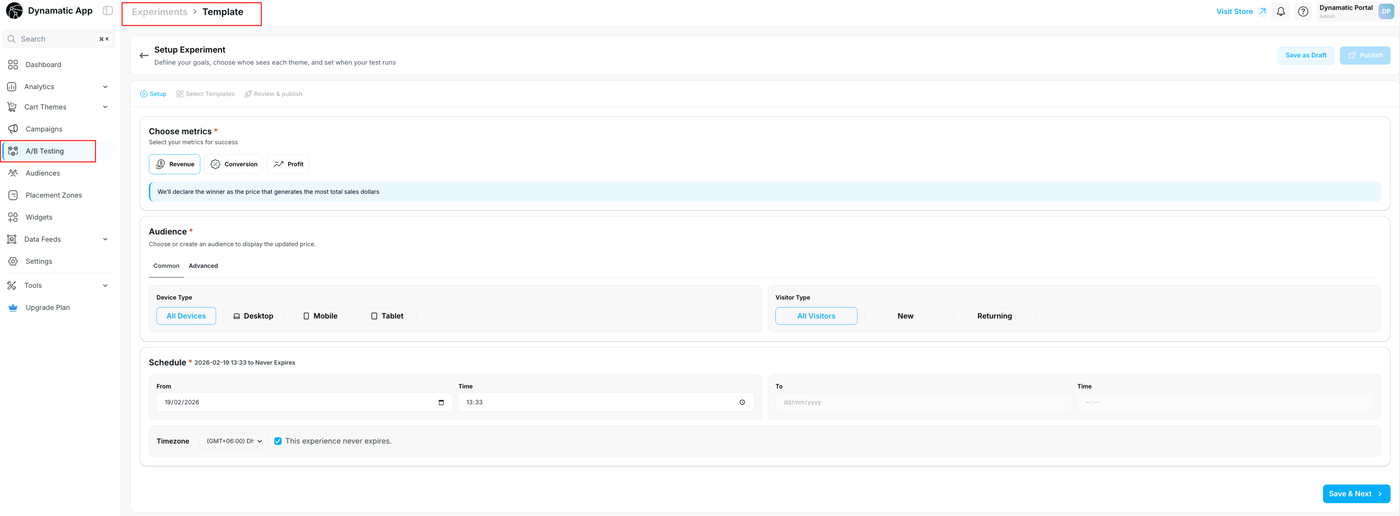
Start by navigating to the Setup tab to define the core parameters of your experiment.
1. Choose Metrics
Select the primary goal you want to measure to determine the winning template.
Revenue: Declares the winner based on the highest total sales dollars generated.
Conversion: Declares the winner based on the highest percentage of users who complete a purchase.
Profit: Declares the winner based on the highest total profit, factoring in both sales volume and your profit margins.
2. Select Your Audience
Determine which users will be included in this test.
Common: Use quick filters to segment by Device Type (All Devices, Desktop, Mobile, Tablet) or Visitor Type (All Visitors, New, Returning).
Advanced: Use the search bar or click + Create new audience to build custom, rules-based targeting.
3. Set the Schedule
Choose when the experiment will run.
From: Select your exact start date and time.
To: You can either set a specific end date, or check the "This experience never expires" box to let the test run indefinitely.
Verify your Timezone is accurate.
Click Save & Next to proceed.
Step 2: Select Templates & Traffic Allocation
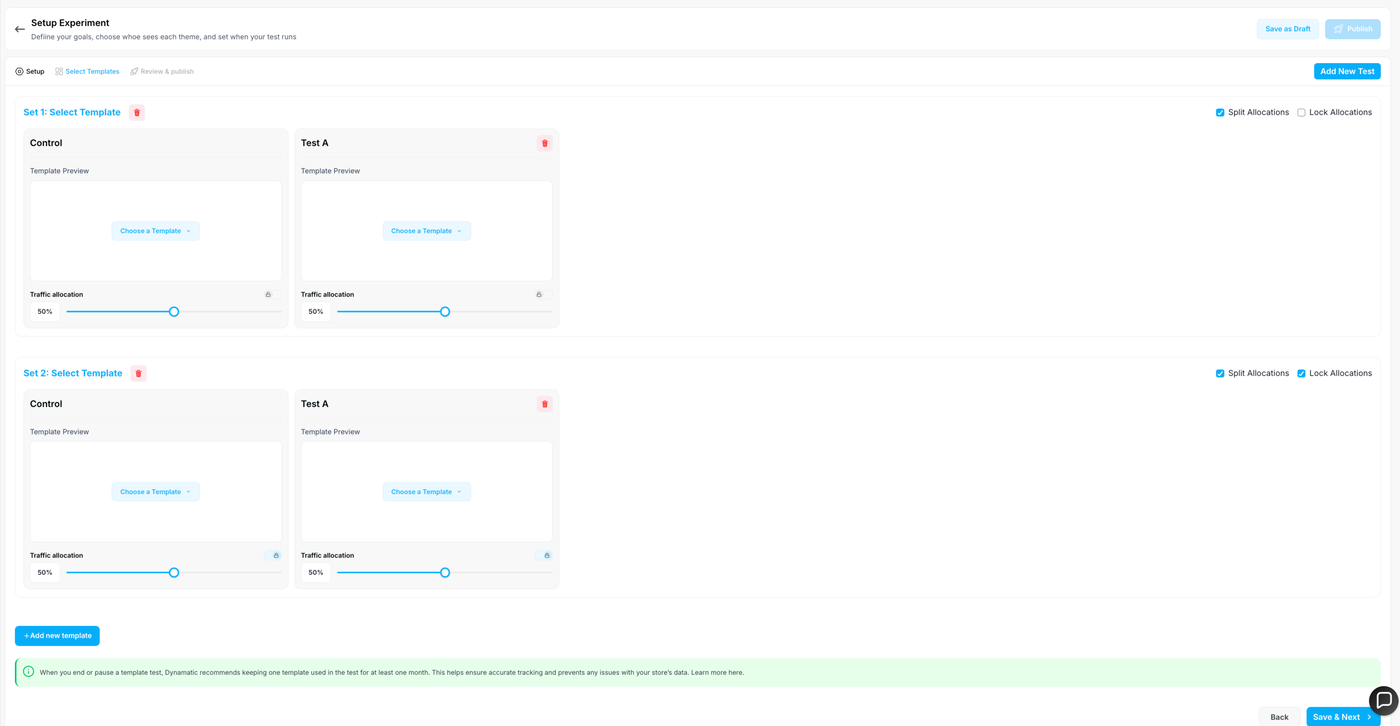
In the Select Templates tab, you will map your original template against your new variations.
1. Assign Your Templates
You can create multiple "Sets" if you are running tests across different products or pages simultaneously.
Control: This is your original, existing template. Click the Choose a Template dropdown to select it.
Test A: This is your duplicated, modified template. Click Choose a Template to select the variation you want to test against the Control.
2. Allocate Traffic
Use the sliders beneath each template preview to determine what percentage of your audience sees each version.
By default, traffic is usually split 50% / 50%.
You can use the Split Allocations checkbox to ensure traffic is divided evenly automatically.
Use the Lock Allocations checkbox if you want to freeze a specific percentage on a variation.
If you need to test additional templates, click the blue + Add new template button at the bottom.
Step 3: Review & Publish

The final Review & publish tab allows you to verify your configurations before setting the test live.
Review the Summary: Check the overview at the top to ensure your Visitor Type, Device Type, mapped Templates, Metric, and Duration are correct.
Verify the Variant Split: Look at the visual cards to confirm your traffic allocations (e.g., Control 50%, Test A 50%) match your intentions.
Launch: If everything looks good, you can proceed to publish the test or click the Back button to make adjustments.