05.2 Setting up widgets on Checkout
Important Note: Only widgets specifically designed for checkout compatibility can be deployed in the Checkout Zone. Please verify a widget's compatibility within the Widget Gallery during the initial creation process to ensure it functions correctly in the checkout environment.Phase 1: Pre-Configuration Verification
Before attempting to integrate the solution, please verify that all foundational components have been successfully created and saved. You must have the following three elements finalized for the specific widget you intend to display on the Checkout page:
The Zone: Ensure the target location (zone) for the widget has been defined.
The Widget: Confirm that the visual widget itself is designed and saved.
The Campaign: Verify that the logic and rules (campaign) associated with that widget are active.
To successfully create and deploy a widget to your storefront, you must configure four core components in a specific order. You can find the full walkthrough in our Getting Your Dynamatic Widget Live documentation.
Note: If any of these four elements are missing or incomplete, the setup process in the settings menu may fail to link correctly.
Phase 2: Navigation Instructions
Once you have confirmed that the assets above are ready, proceed with the final configuration steps:
Log in to the Dashboard: Navigate to your Shopify Partner account or the relevant application dashboard where your widgets are managed.
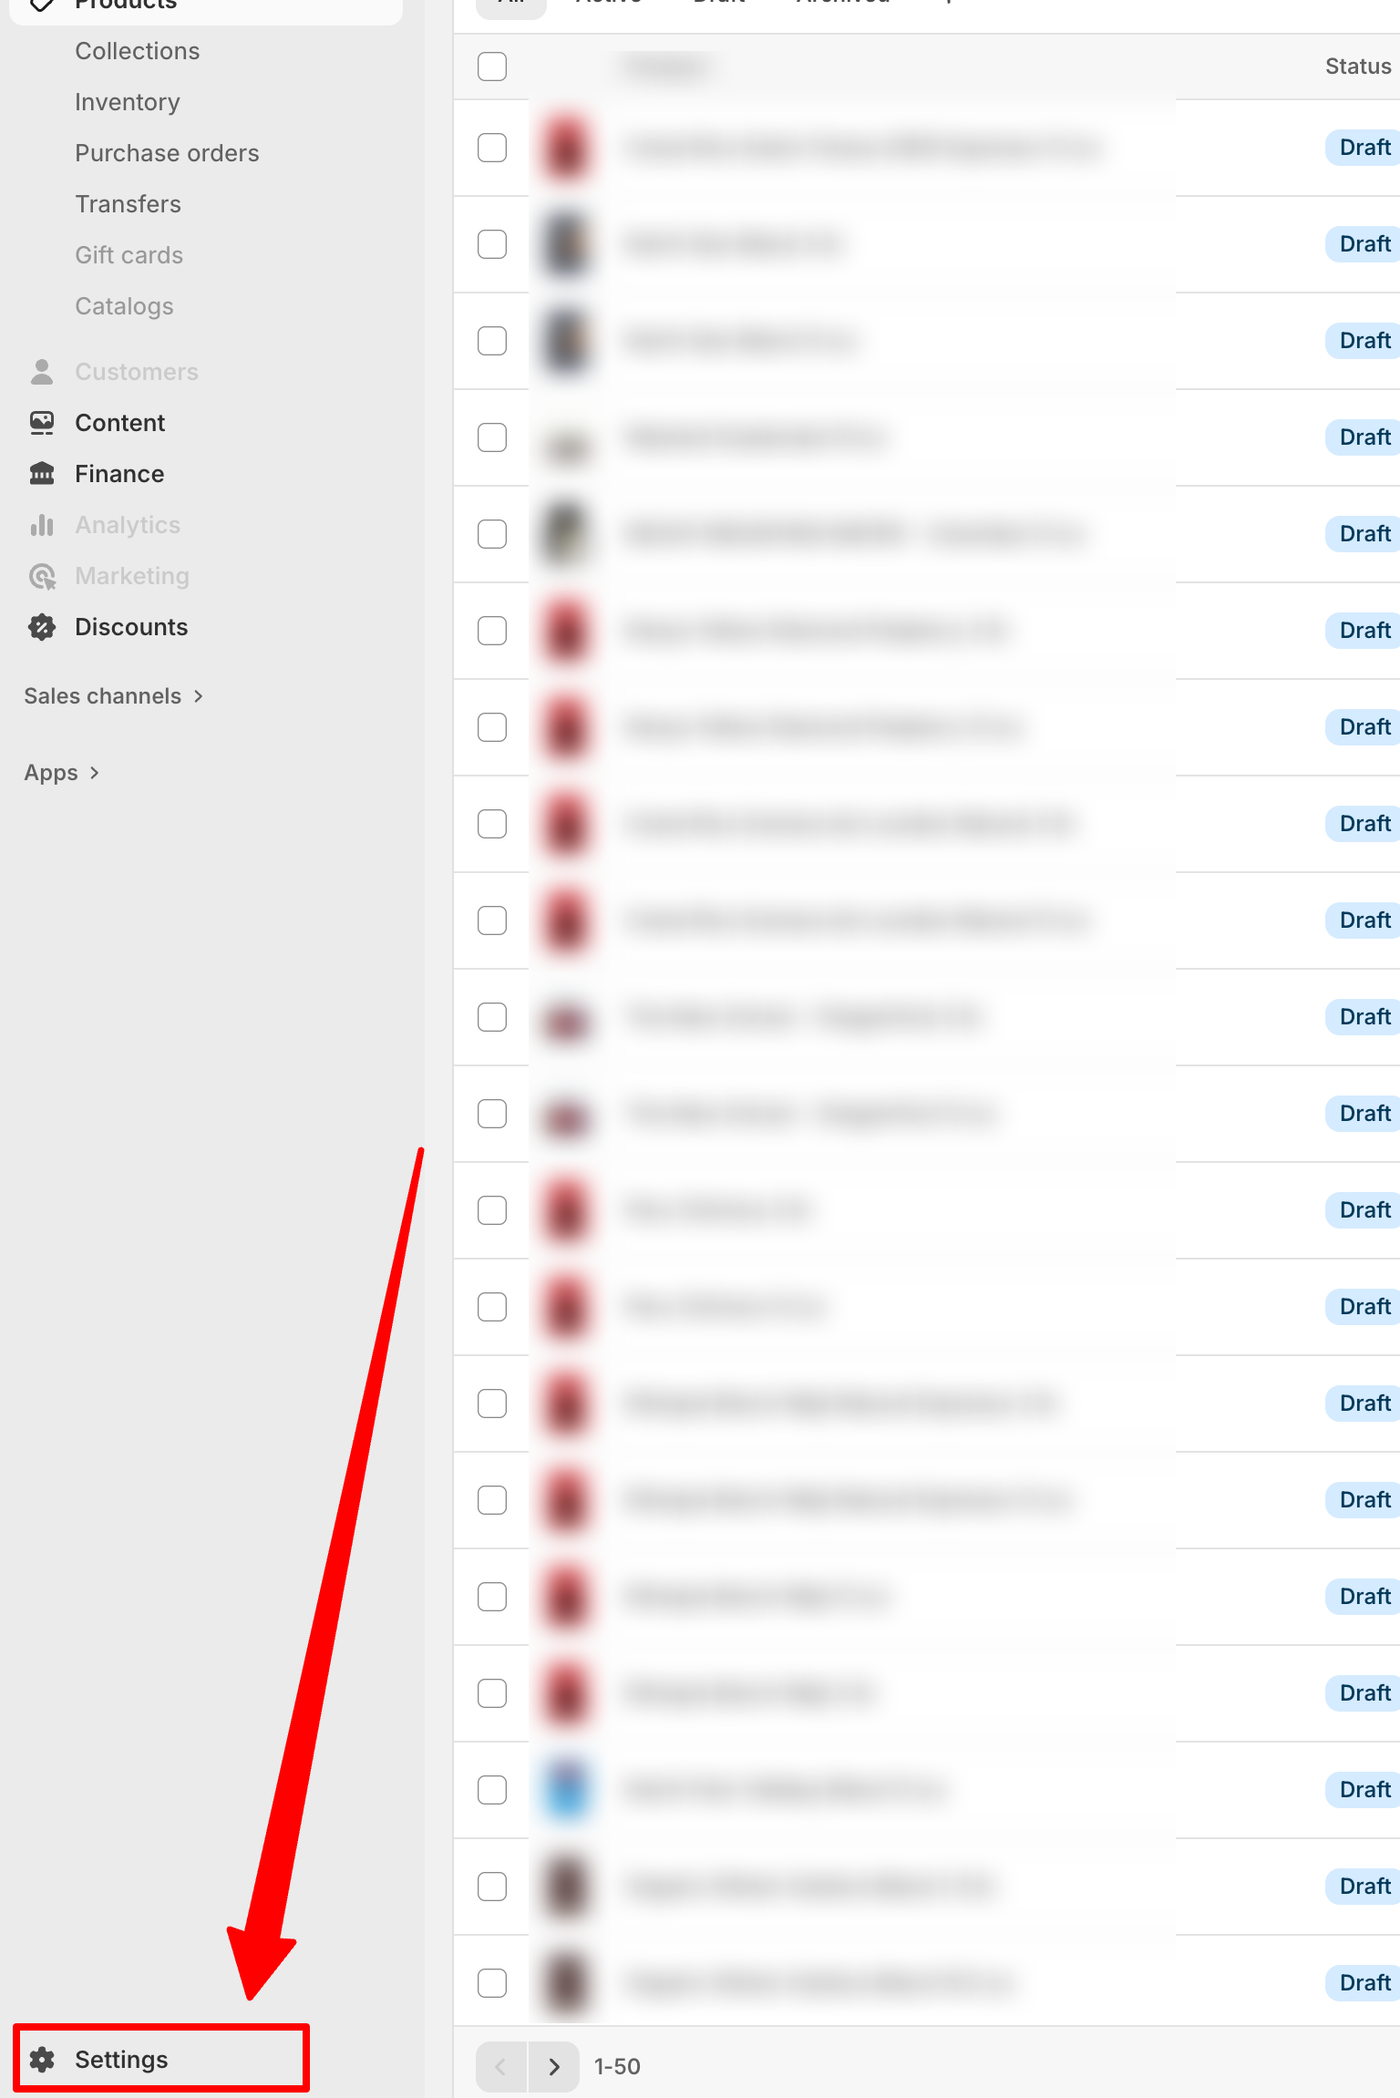
Locate the Menu: Look for the main navigation menu, typically found on the sidebar.
Access Settings: Click on Settings. This section will allow you to finalize the installation and inject the widget into your Shopify Checkout flow.
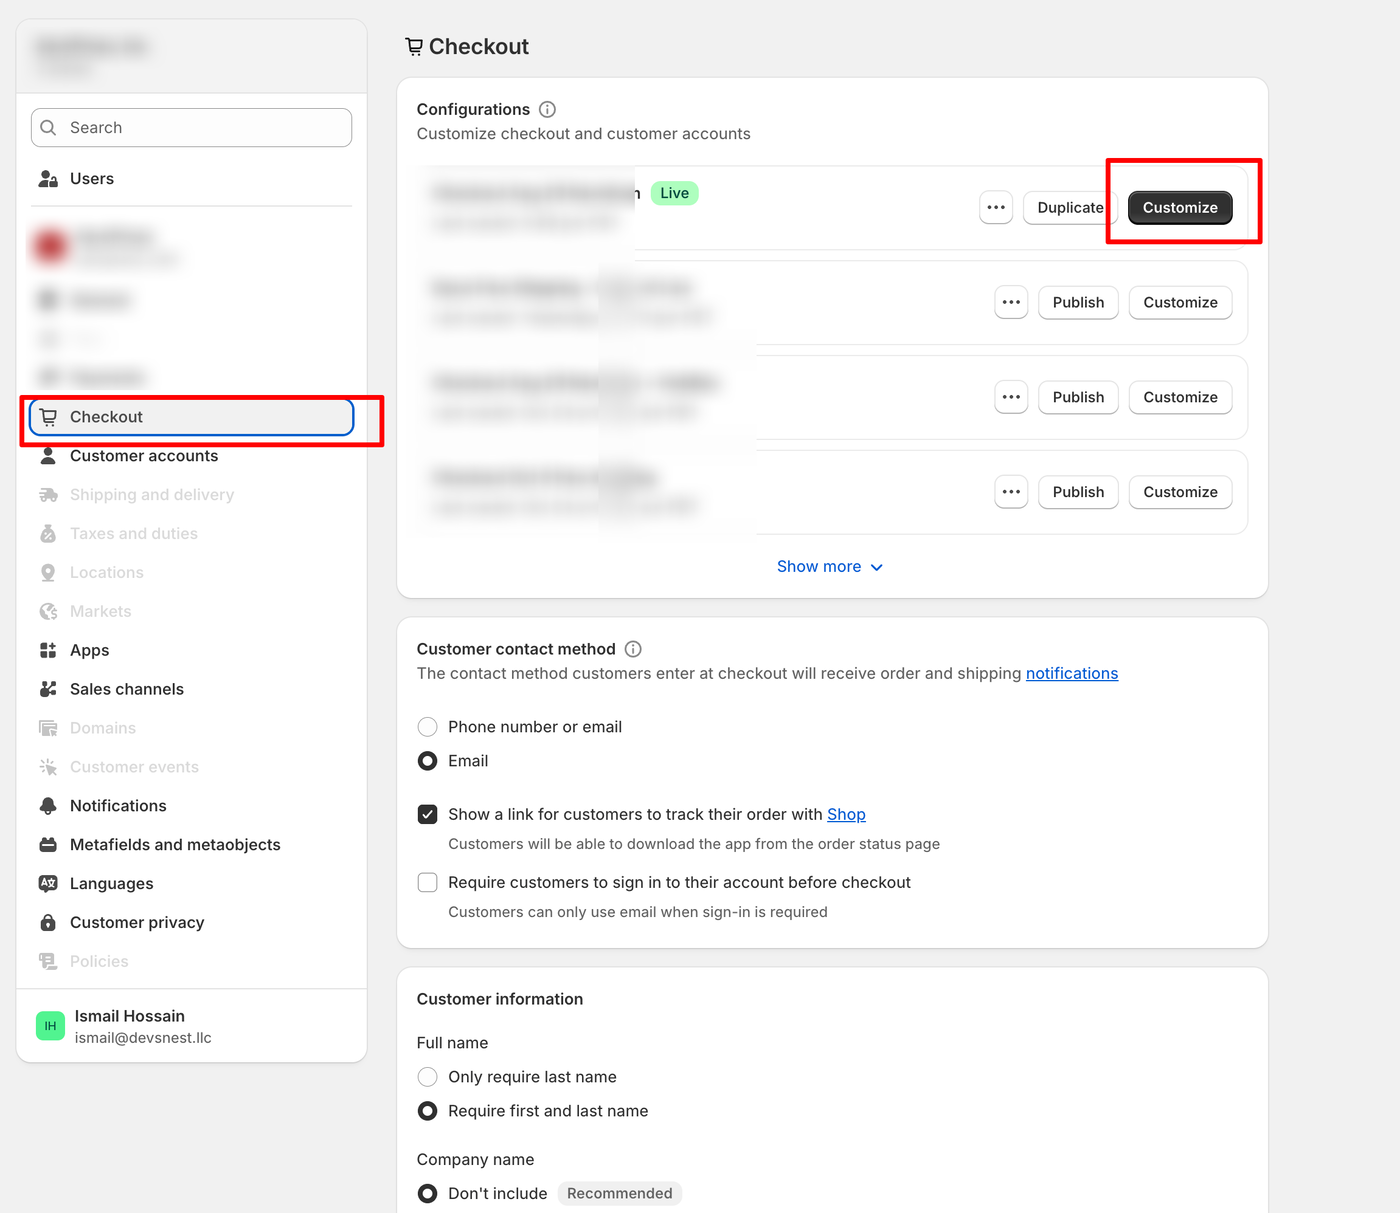
Navigate to Settings > Checkout. Under the checkout configurations, identify the theme you wish to use and navigate to its customization settings to place your created checkout widget zone.
In a previous section, we learned how to create a zone. Here, we will guide you through the process of adding that zone to your storefront. This final step is what allows your customized widget to be displayed to customers on your live store.
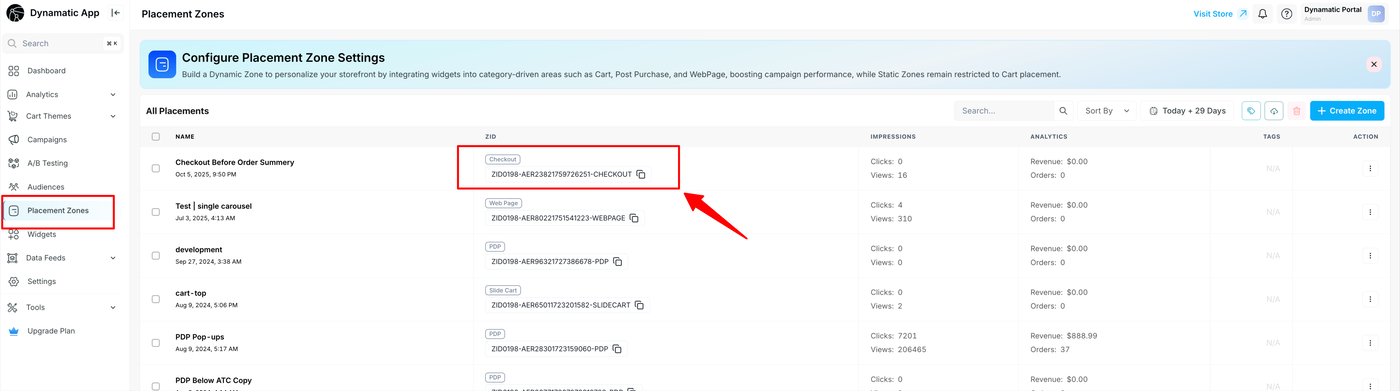
Navigate to: https://dashboard.dynamatics.app/zones
To add the zone, simply double-click on your desired zone in the list. This action will automatically copy the Zone ID to your clipboard. You will need this ID to complete the integration on your storefront.
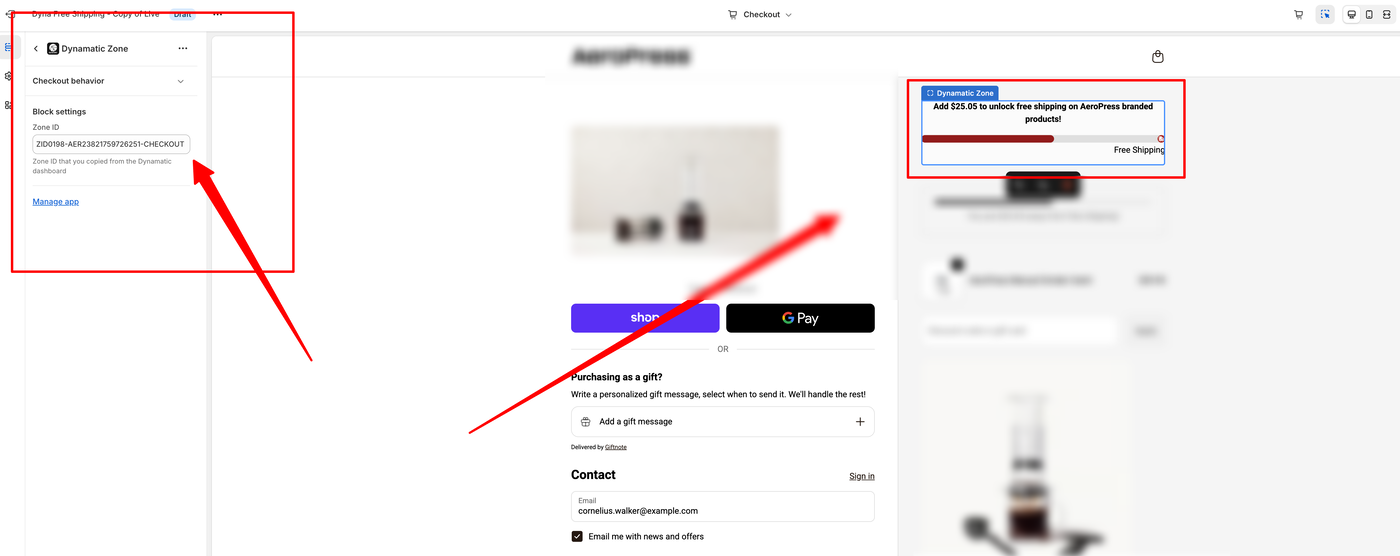
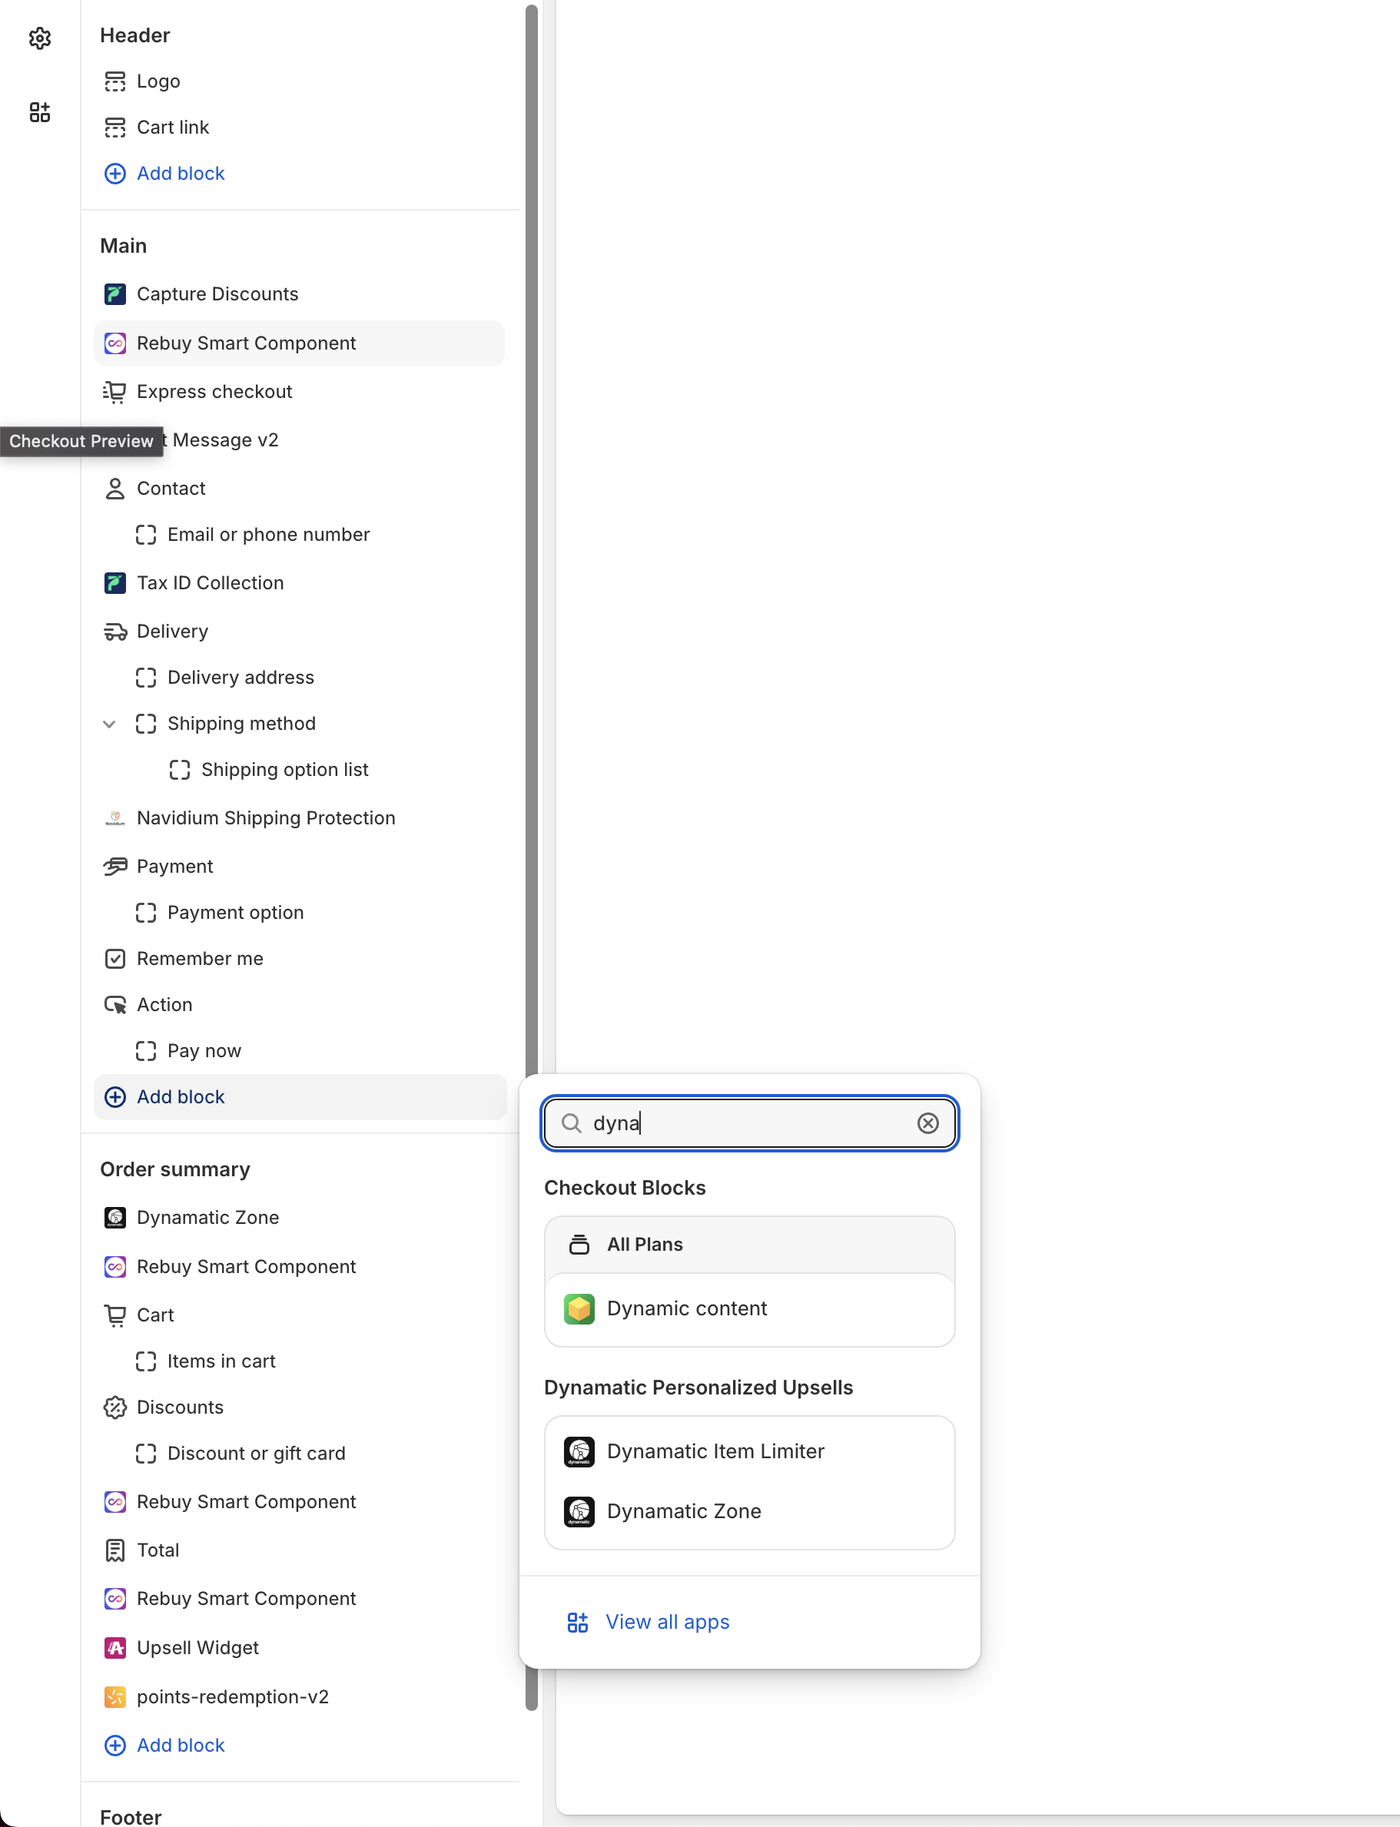
ccess your Checkout Theme Customization editor. From the side panel, click Add Block (or App Block) and select Dynamatic Zone from the list of available apps. Once the block appears, simply drag and drop it to the specific location where you want your widget to be displayed on the page.
Finally, paste your unique Zone ID into the designated field within the app block settings. Click Save in the theme editor, and your widget will now be live and visible on your storefront.