
03. Creating Placements and Zones
Today, we will explore Placements and Zones, which are crucial for displaying your widgets on your Shopify store.
Placement Zones are the critical link between the widgets you design and your live storefront, serving as designated slots across pages like the Cart, Checkout, and Webpage where dynamic content can be injected. By creating a Zone—a process that involves naming the slot and often dragging an element to a specific location (e.g., cart_top)—you precisely tell the Dynamatic App where content should appear. This mechanism grants you centralized control over widget positioning, allowing you to efficiently target high-conversion areas with tailored experiences without ever needing to write or manually modify theme code.
Learn more about placements and zone from here: Placement and Zones
What are Zones?
In the Dynamatic app, Zones are specific areas or slots on your Shopify storefront where widgets can be displayed. You can think of a zone as a designated location where you want to inject content, such as:
Cart page
Checkout page
Thank you page
Webpage
Post-purchase screen
When you create a zone, you are telling Dynamatic precisely where your widget should appear and what area of your Shopify theme the app should target.
How Do They Work?
In your Dynamatic dashboard, you define zones that correspond to specific parts of your store's layout. Each widget you build can then be assigned to a zone. The app works by connecting with your Shopify theme or checkout structure to dynamically inject your widgets into the correct places. This gives you full control over placement without needing to manually add code to your theme.
Examples of Zones:
Cart Zone: Display a gift wrap upsell or a tiered progress bar.
Checkout Zone: Show a discount code input field.
Thank You Zone: Present post-purchase offers.
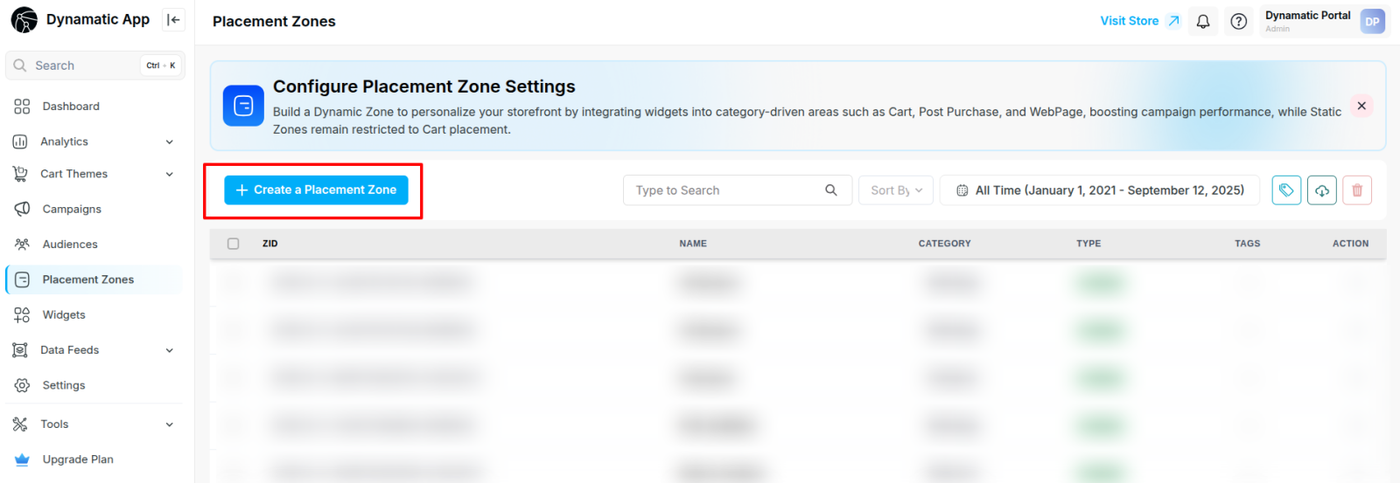
Process to Create a Zone for Cart
To create a new zone, follow this simple process: Placement → Zones → Create a placement Zone
Process to Create a Zone for the Slide Cart
For this , we are focusing on adding a widget to the Dynamatic Slide Cart Draw, which is entirely powered by our app backend. The process is done directly within the Dynamatic interface.
Step 1: Access the Zone Creation Area
Head over to the Placements section of your app.
Select Zones.
Click the Create Zone button.
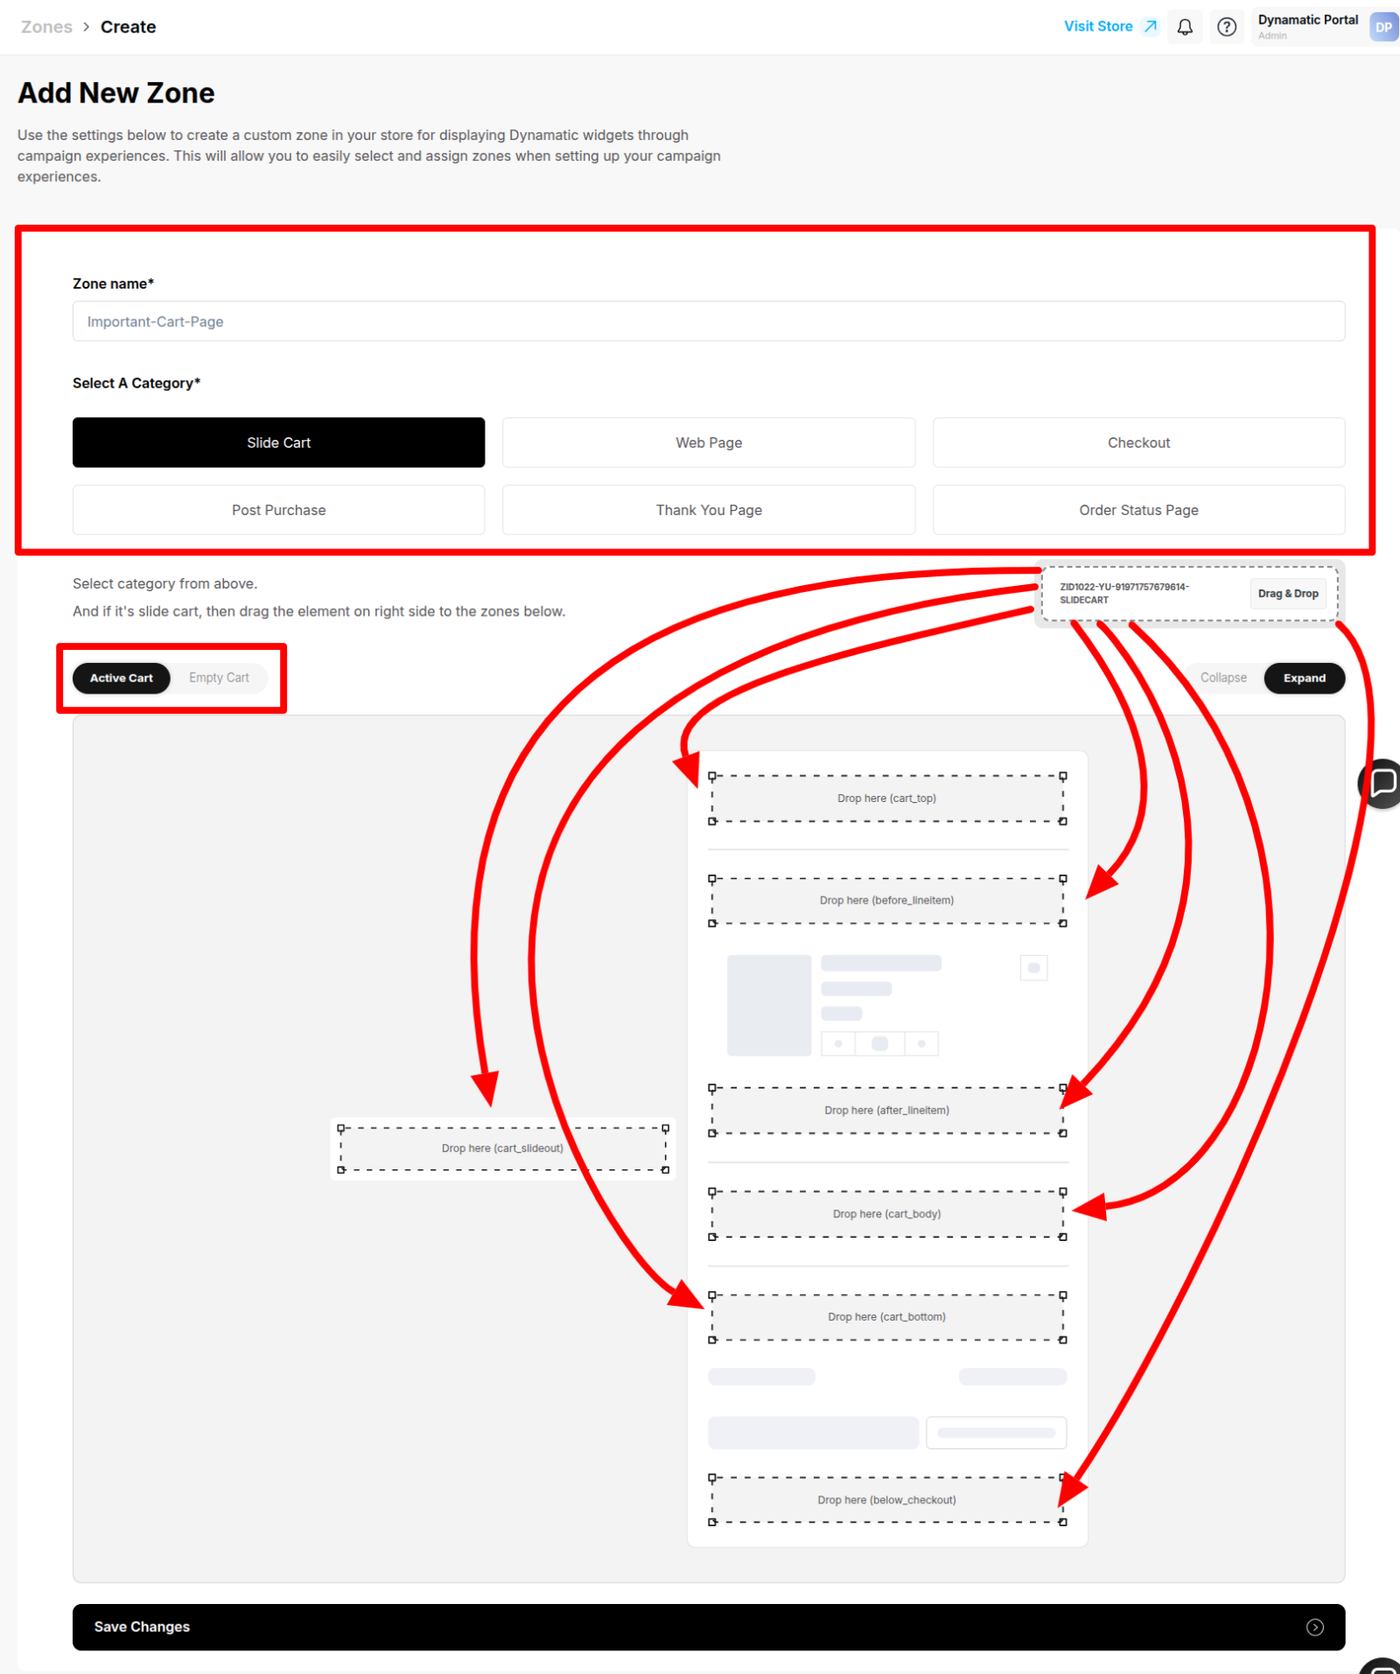
Step 2: Define and Place Your Zone
After selecting Create Zone, you will be presented with a page to define your placement.
Select a Category: Choose the appropriate category for your widget's placement. You will most likely see two default categories: Slide Cart and Post Purchase. For this guide, select Slide Cart.
Note: These categories help you organize your zones, and you can create as many new categories as you need.
Access the Builder: Since you selected Slide Cart, you will enter the slide cart zone builder, which displays predefined "slots" in the cart's drag-and-drop editor.
Place the Zone: You will see a reusable rectangle Zone element that can be dragged into any position inside the cart editor. Since we want a widget (like a Tier Bar) to display at the very top, drag the Zone to the very first area:
cart_top.Name Your Zone: Fill in the Zone Name with a clear, descriptive title (e.g., "Demo: Top Cart"). This is essential for easily identifying the Zone when setting up your Campaign.
Save Changes: Click the Save Changes button at the bottom of the page.
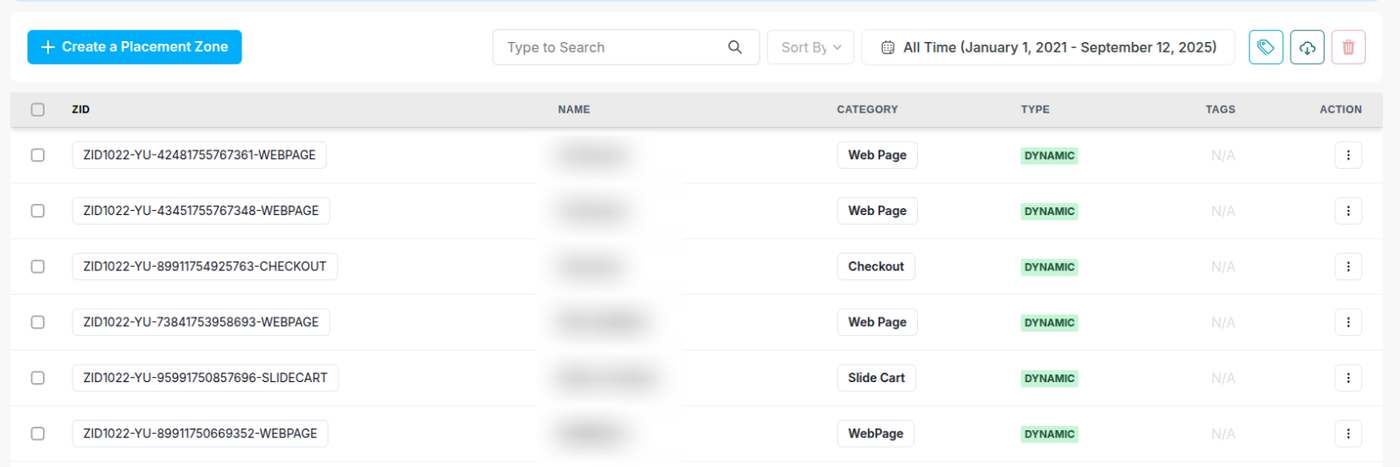
Once these steps are completed, your Zone is successfully created and will appear in your list of Zones under Placement → Zones. You have officially created a placeholder in your cart that is ready to populate a widget!
Creating Your Zone for other categories except for Cart
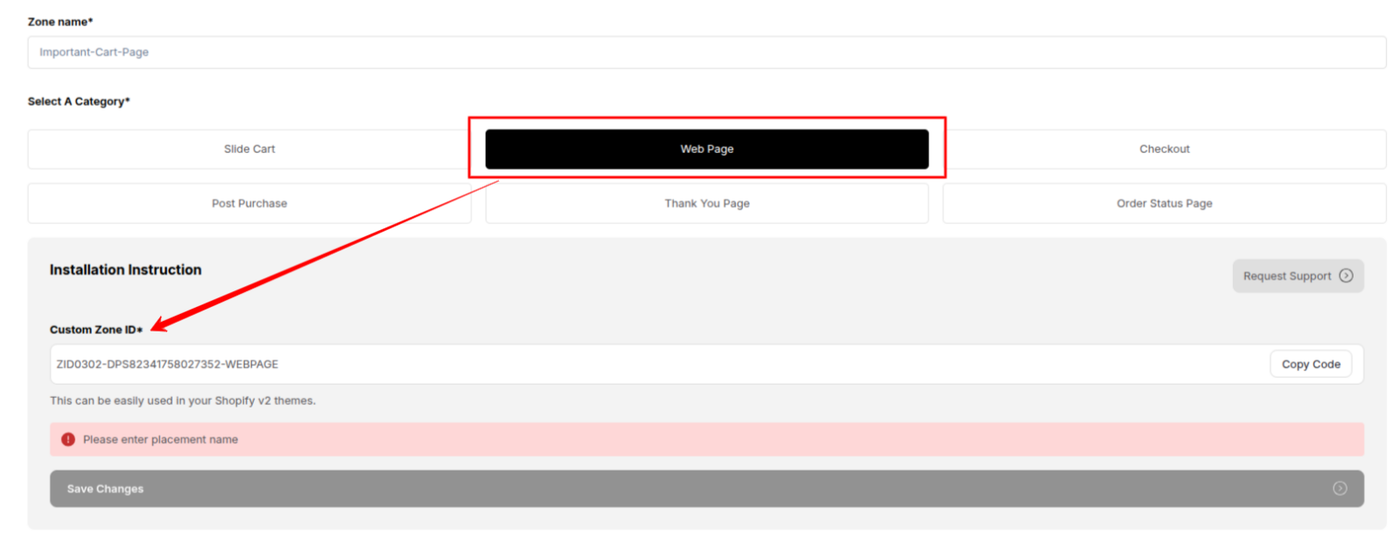
For this, you will have to select Create Zone, you will be presented with a page to define your placement.
Name Your Zone: Fill in the Zone Name with a clear, descriptive title. This will help you identify the zone later.
Select a Category: Choose the appropriate category for your widget's placement. For this example, select Webpage.
Place the Zone: Based on your selection, you will be able to place the zone within your cart.
Save Changes: Click the Save Changes button.
If you are not using the slide-cart, simply choose your desired zone from the following options. Each option represents a dedicated section of your storefront where you can display your widget.
Once these steps are completed, your zone is successfully created and will appear in your list of zones under Placement → Zones.
Congratulations! Your zone creation is now complete.
Next step is 04. Campaigns