
Advanced Free Gift Widget
Creating the Advanced Free Gift Widget
This section guides you through the process of creating and configuring the Advanced Free Gift Widget, a powerful tool designed to boost Average Order Value (AOV) and conversions through compelling gift-with-purchase offers.
Widget Overview
Widget Name: Advanced Free Gift
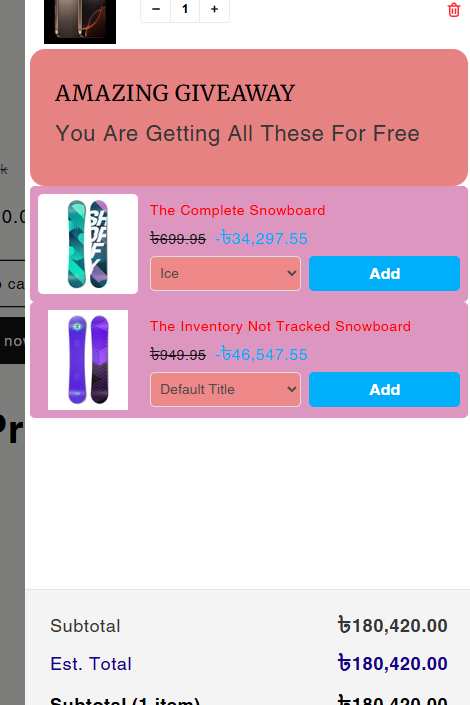
Purpose: Displays promotional products that can be added to the cart for free as part of a gift-with-purchase offer. It is commonly used to boost conversions, increase AOV, and reward customer loyalty.
Where It Works: Cart, Checkout, Webpage
Main Features:
Displays the product's original price struck through and marks it clearly as "Free".
Includes variant selectors for gifts that have multiple options.
Features prominent "Add" buttons for easy inclusion in the cart.
Allows for a section title to clearly highlight the promotion.
Configuration Options:
Select which products are offered as gifts.
Set eligibility rules (e.g., trigger conditions based on cart value or contents).
Customize the display (title, color scheme, button text).
Enable/disable specific page locations (Webpage, Cart, Checkout).
Decide whether the gift auto-applies or requires the user to click "Add."
Playbook
Stop discounting your brand value—give value instead. A 20% discount lowers your perceived brand worth. A free gift adds to it. The Advanced Free Gift widget allows you to incentivize purchases without cutting into your product margins. By offering a tangible reward (that customers can actually select variants for, like size or color), you trigger the "reciprocity" effect, making customers feel compelled to complete the purchase to secure their reward.
The "Why" & The Metrics
Primary Metric Impact: Average Order Value (AOV) and Conversion Rate (CR).
The Psychological Trigger: The Zero Price Effect. The word "Free" makes us irrationally excited. It creates a perceived value that often exceeds the actual cost of the item.
Best Fit Industries: Beauty (Samples/Minis), Apparel (Socks/Totes with purchase), Supplements (Shakers/Travel packs).
Strategic Use Cases (The "Plays")
Play #1: The "Perfect Pair" (BOGO Logic)
The Concept: "Buy these Running Shoes, get these Performance Socks for Free."
The Logic: This acts as a targeted cross-sell that feels like a reward. You are using a specific Trigger Product to ensure the gift is relevant.
Configuration Strategy:
Trigger: Under Product Area, select the high-value item (Shoes) as the Trigger Product.
Gift: Select the accessory (Socks) as the Gift Selection.
Feature: Ensure the variant selector is active so they can pick their sock size.
Play #2: The "Liquidation Hero" (Dead Stock Mover)
The Concept: Use slow-moving inventory as an incentive to close deals on new arrivals.
The Logic: Instead of paying storage fees for items that aren't selling, turn them into conversion tools.
Configuration Strategy:
Trigger: Show on Cart or Checkout.
Offer Type: Set to Automatic or Conditional based on the main purchase.
Copy/Creative Idea: Title: "Free Mystery Gift with your order!" (using the overstocked item).
Play #3: The "Sample Hook" (New Product Intro)
The Concept: Force trial of a new product line by giving a "Mini" version away with best-sellers.
The Logic: Reduces the barrier to entry for new products. If they like the sample, they will come back to buy the full size.
Configuration Strategy:
Zone: Webpage (Product Page) or Cart.
Limit: Use Limit Allowed Gifts to "1" to ensure costs are controlled.
Display: Use the Subtitle Text to say "Try our new flavor on us!"
Pro-Tips & Constraints
Smart Constraint: This widget is unique because it supports Variant Selectors. Most GWP apps force a specific "one size fits all" item. Use this to your advantage by offering apparel or specific shades as gifts.
Inventory Check: If your Gift Product goes out of stock, the widget may stop displaying. Always have a backup plan or monitor inventory for your gift items.
Placement: Placed on the Cart page, it acts as a "sweetener" to prevent abandonment. Placed on the Webpage (Product Page), it acts as a primary value prop to drive the initial click.
Step-by-Step Creation
Click Create Widgets: From your dashboard, click Create Widgets. A new page titled "Add New Widgets" will appear.
Fill in the Details: Fill in the Widget Title and a Short Description for your widget.
Select a Template: If any existing widgets align with your title, they will appear at the bottom of the page. Select the desired template.
Choose the Advanced Free Gift Template: Click Next. Two Advanced Free Gift templates will appear. Select your preferred template and click Select.
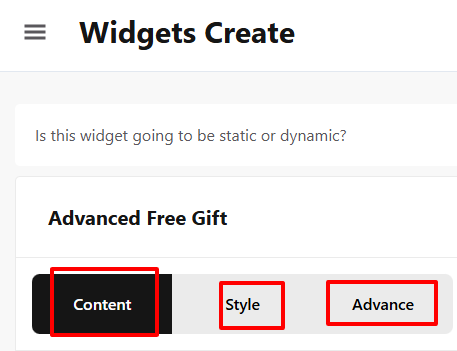
Widget Configuration: Content
After selecting your template, you will be taken to the configuration screen, which includes the Content, Style, and Advanced options. We will start with the Content tab.
 | 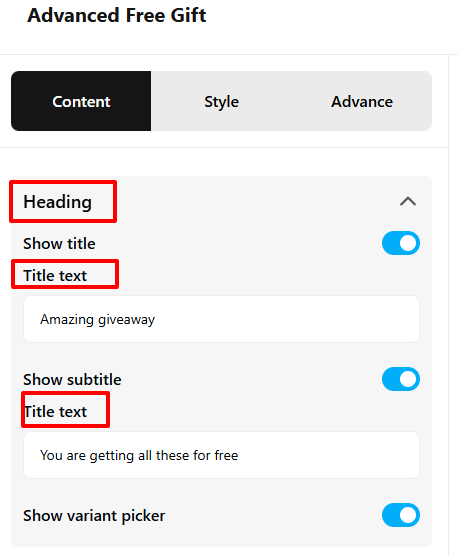 |
General Options
The General section controls the primary text of your offer:
Heading Title: Customize the main title that appears above the widget.
Subtitle Text: Add a subtitle to provide brief context or urgency for the free gift offer.
Offer Type Configuration
This section is crucial for defining the logic of your free gift offer:
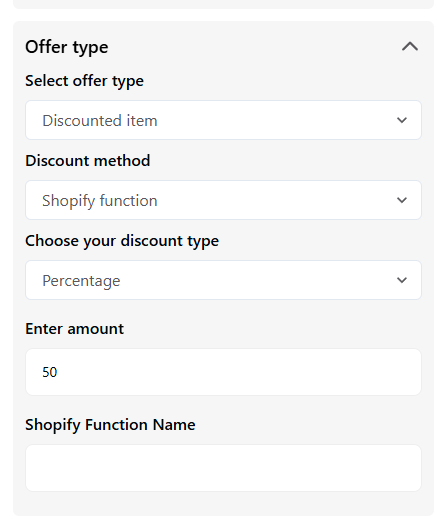
Offer Type: Set the method by which the gift is offered (e.g., automatic or conditional).
Discount Method & Type: Select the discount method and type that will be applied to the gift product (this ensures the product is correctly priced at $0).
Product Area
The Product Area is where you define the eligibility and the gifts offered:

Trigger Product(s): Specify the product or products a customer must purchase to unlock the free gift.
Gift Selection: Choose the gift product(s) to offer from your store's feed.
Limit Allowed Gifts: Set a maximum number of gifts a customer is allowed to receive, controlling promotion costs.
Once you have completed all the settings in the Content section, click Save Changes.
Widget Configuration: Style and Advanced
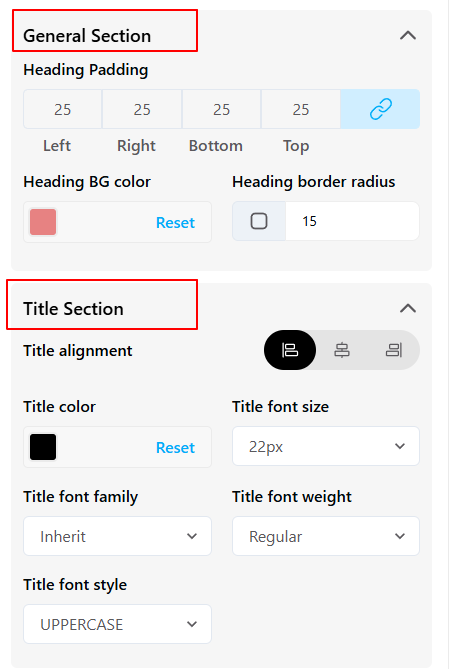
Style Section
The Style tab gives you comprehensive control over the widget's visual appearance:
Heading and Title: Customize the widget's overall presentation, including background color, title color, font size, font family, and font weight for the main title.
Subtitle Options: Adjust the appearance of your subtitle text, including color, font size, font family, and font weight.
Product Details: Customize the styling of the product information within the widget to ensure visual continuity with your store.
Advanced Options
The Advanced tab provides final control over where and how the widget is displayed:
Device Targeting: Select which devices (Desktop, Tablet, or Mobile) the widget will appear on.
Custom CSS: Input custom CSS for fine-tuning the design beyond the standard options.
Click Save to finalize your widget.
Publishing Your Configured Widget Live
This following documentation section provides the final, detailed steps required to publish your fully configured widget and make it visible to customers on your live storefront.
01. How to successfully setup a widget
02. Understanding and Creating Audiences
03. Creating Placements and Zones
05. Displaying Your Widgets on the Storefront
Viewing the Live Widget
Your Advanced Free Gift Widget is now complete. Once you have integrated the widget into a campaign and a zone on your website, you can go to your storefront and trigger the conditions to see your new widget live.