
Post Purchase Pro Widget
The Post Purchase Pro Widget is a high-impact conversion tool designed to present a final, irresistible offer immediately after a customer confirms their order, but before they leave the store.
Widget Overview
Widget Name: Post Purchase Pro
Core Purpose: Captures "impulse revenue" by offering a one-click upsell or cross-sell at the moment of highest customer trust—right after a successful payment.
Where It Works: Post-Purchase Page (The confirmation screen before the "Thank You" page).
Key Features:
Smart Personalization: Dynamically addresses the customer by name (e.g., "Jon Smith, before you go!").
Scarcity Timers: Built-in countdown timer with urgency styling (e.g., Red background) to drive immediate action.
Smart Variant Matching: Can automatically pre-select variants that match the customer's initial purchase (e.g., if they bought a Medium shirt, offer a Medium hoodie).
Frictionless "Pay Now": Allows for instant addition to the order without re-entering payment details.
Limitations: Designed for a single, focused product offer rather than a multi-product carousel.
Playbook
The hardest part is over—you already have their trust. Most sales are lost because of friction (entering shipping info, credit card numbers, etc.). The Post Purchase Pro widget triggers after the hard work is done. The customer has already paid, their wallet is open, and their dopamine is high. This widget allows you to turn a $50 order into a $75 order with a single click, leveraging the psychology of "Commitment and Consistency."
The "Why" & The Metrics
Primary Metric Impact: Average Order Value (AOV) and Customer Lifetime Value (LTV).
The Psychological Trigger: Urgency & Scarcity. The red countdown timer visually demands attention, signaling that this offer is a one-time opportunity.
Personalization: By using the
{{first-name}}variable, you arrest the user's attention immediately (e.g., "Jon Smith, before you go!") rather than using a generic headline.
Strategic Use Cases (The "Plays")
Play #1: The "Smart Match" (Frictionless Fashion)
The Concept: If a customer buys a Medium T-shirt, offer them the matching Hoodie also in Medium.
The Logic: Selecting a size is a friction point. If they have to think "Will this fit?", they might bail. Pre-selecting the size removes the last barrier to purchase.
Configuration Strategy:
Trigger: Purchase of a sizing-dependent product.
Key Setting: Under the Variants tab, select "Smart - match initial purchase" for Variant preselection.
Creative Idea: "We saw you grabbed a Medium — here's the matching jogger in the perfect size."
Play #2: The "Flash Discount" (The OTO)
The Concept: A "One Time Offer" (OTO) that gives a heavy discount (e.g., $25 off) valid only for the next 15 minutes.
The Logic: The high discount combined with a visual timer creates immediate FOMO (Fear Of Missing Out).
Configuration Strategy:
Key Setting: Enable Timer and set the Background Color to "Red" to induce urgency.
Discounting: Use the Discount settings to set a fixed "$ off" amount (e.g., 25) to make the math easy for the customer.
Creative Idea: "Your order is confirmed, but you can still add this Mystery Box for 50% off - Expires in 15:00."
Play #3: The "VIP Access"
The Concept: Frame the upsell not as a sales pitch, but as a benefit of their recent purchase.
The Logic: Reciprocity. You are giving them "Free Shipping" on this add-on because they are now a customer.
Configuration Strategy:
Key Setting: In the Shipping tab, ensure Shipping Type is set to "Free Shipping" so the upsell feels like a bonus, not a burden.
Button Copy: Change the "Pay button text" to "Add to Order (Free Shipping)".
Pro-Tips & Constraints
Smart Constraint: This widget is a Single Product Upsell. It is not designed for browsing. Pick one high-converting item rather than overwhelming the user with choices.
Optimization Tip: Always use the
{{first-name}}variable in your Heading. It acts as a "pattern interrupt" that stops customers from closing the tab.Inventory Note: You can choose to "Hide product when out of stock" in the Variants settings to prevent offering an item that can't be fulfilled.
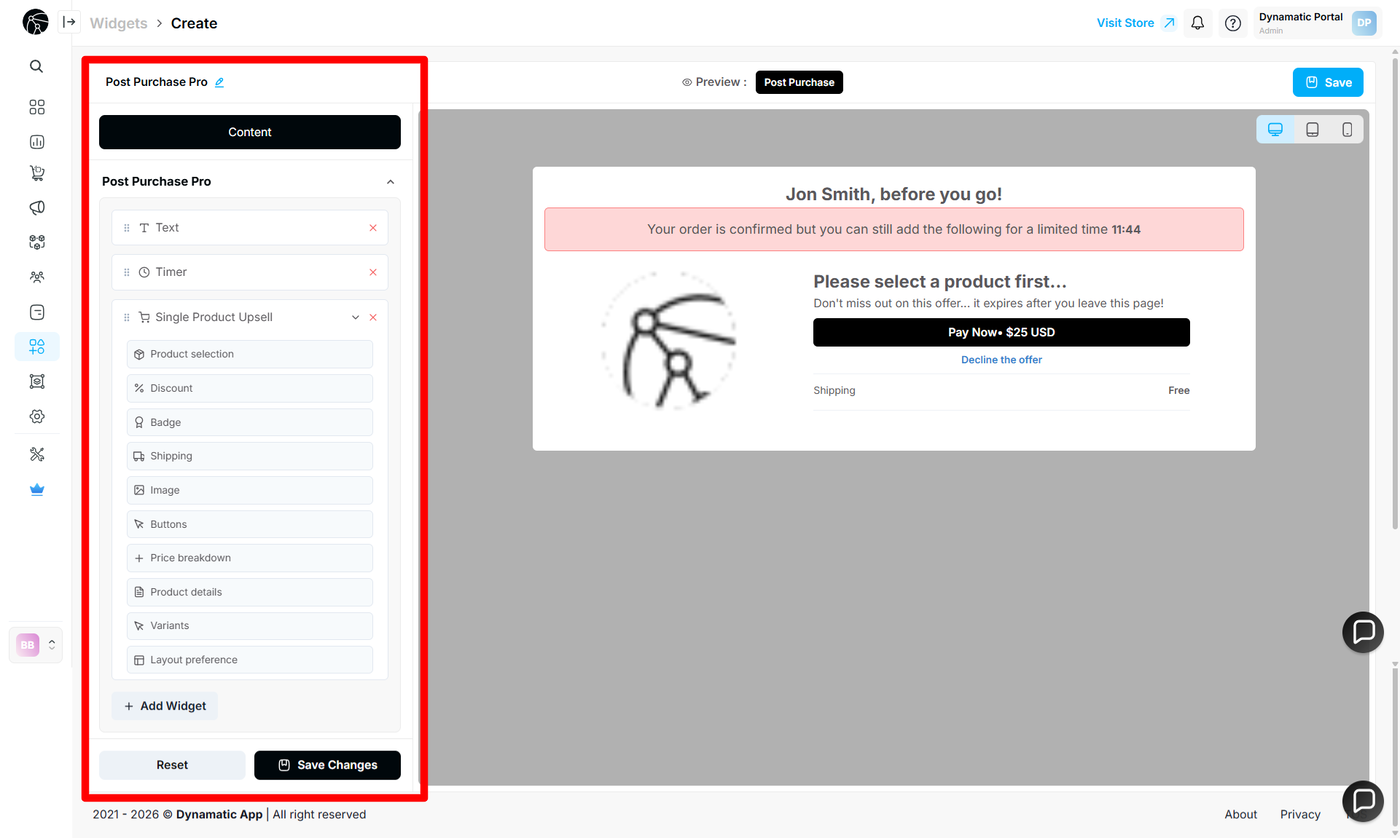
Configuration Options
The Post Purchase Pro widget is configured through a centralized Content panel that manages logic, visuals, and offers in a single vertical flow.
1. Step-by-Step Widget Creation
Click Create Widgets in your Dynamatic dashboard.
Search for and select Post Purchase Pro.
Click Next to enter the editor.
2. Content Configuration
The Content tab allows you to customize every element of the post-purchase modal.
Section | Functionality | Detail |
Text | Controls the main headline and welcome message. | Supports dynamic variables. Use {{first-name}} to automatically insert the customer's name for higher engagement. |
Timer | Adds a countdown clock to create urgency. | You can set the Offer Timer (minutes) and customize the Background Color (e.g., Red) to make it stand out. Use {{timer}} in the heading to display the clock. |
Product Selection | Defines which product is offered as the upsell. | You can select products Manually or use Feeds for dynamic selection. |
Discount | Incentivizes the purchase. | Choose a Discount Type (e.g., "$ off") and set the Automatic Discount value (e.g., 25). You can also add a custom "Discount Message". |
Shipping | Controls shipping costs for the add-on. | Set the Shipping Type to "Free Shipping" to reduce friction. You can also customize the "Shipping Title" displayed to the user. |
Image | Manages product visuals. | You can adjust the Main Image Size slider (200-600px) or Upload a custom product image if the default one isn't appealing. |
Buttons | Customizes the "Buy" and "Skip" actions. | Edit the Pay button text (e.g., "Pay Now") and the Decline button text (e.g., "Decline the offer"). You can also toggle "Require confirmation click to accept". |
Price Breakdown | Displays financial details. | Toggle "Show shipping and tax breakdown" to be transparent about costs. You can position this at the bottom of the widget. |
Variants | Manages sizes/colors and stock logic. | Key Feature: Set Variant preselection to "Smart - match initial purchase" to automatically pick the same size the customer just bought. You can also hide products when out of stock. |
3. Advanced Customization
Layout Preference: Adjust the spacing and padding of elements to fit your brand guidelines.
CSS Styling: For developers, specific elements can likely be targeted via custom CSS in the main settings (standard Dynamatic feature).
Publishing Your Configured Widget Live
This following documentation section provides the final, detailed steps required to publish your fully configured widget and make it visible to customers on your live storefront.
01. How to successfully setup a widget
02. Understanding and Creating Audiences