
Single Variant Selector Widget - Post Purchase
This section will guide you through creating a Single Variant Selector Widget, a powerful tool for offering a quick, post-purchase upsell to your customers.
Widget Overview
Widget Name: Single Variant Selector
Purpose: This widget allows customers to quickly choose and purchase a specific product variant—such as a size or color—directly on the post-purchase page. It simplifies the selection process and increases the likelihood of an instant conversion.
Where It Works: Post-purchase page
Playbook
The hardest part is over—you already have their credit card. Most post-purchase offers fail because they are too rigid. If you offer a t-shirt as an upsell, but the customer can't pick their size or color, they won't buy. The Single Variant Selector solves this by adding a dropdown menu to your post-purchase offer. It removes the friction of "Is this my size?" and turns a "Maybe" into a "Yes" without requiring the customer to re-enter payment details.
The "Why" & The Metrics
Primary Metric Impact: Average Order Value (AOV) and Customer Lifetime Value (LTV).
The Psychological Trigger: Commitment & Consistency. The customer has already identified as a buyer. Offering a relevant add-on immediately after purchase leverages this momentum ("I'm already buying, might as well get this too").
Best Fit Industries: Fashion (Size/Color variations), Beauty (Shade selection), Nutrition (Flavor selection).
Strategic Use Cases (The "Plays")
Play #1: The "Double Up" Offer (Same Product, New Variant)
The Concept: The customer just bought a product they like (e.g., a Black Hoodie). Offer them the exact same product in a different color (e.g., Grey Hoodie) at a discount.
The Logic: You already know they want this item. The barrier to entry is zero. You just need to let them pick the color.
Configuration Strategy:
Trigger/Condition: Trigger on the specific product ID (e.g., Hoodie).
Key Setting: Set the Heading to "Get another color for 20% off?"
Display: Ensure the variant dropdown is clearly visible.
Play #2: The "Essential Accessory" (Requires Sizing)
The Concept: Cross-sell an accessory that requires a specific fit.
The Logic: If a customer buys running shoes, they need running socks. But socks have sizes. A static image won't work. This widget allows them to select "Size M" and add it to the order instantly.
Configuration Strategy:
Trigger/Condition: Trigger on Footwear products.
Key Setting: Select the Accessory (Socks) as the upsell product.
Copy/Creative Idea: "Don't forget the socks! Add a pair to your order now."
Play #3: The "Sample Pack" (Flavor Selector)
The Concept: Offer a low-risk add-on to try a new product line.
The Logic: For consumable brands, getting a customer to try a new flavor is key to retention. Allow them to pick a single sample flavor packet to add to their box.
Configuration Strategy:
Trigger/Condition: Any purchase over $50.
Key Setting: Select the "Single Sample" product which has variants for flavors (Vanilla, Chocolate, Berry).
Copy/Creative Idea: "Want to try something new? Add a sample flavor for just $2."
Pro-Tips & Constraints
Smart Constraint: This widget is limited to one product at a time. You cannot showcase a carousel of different products here; it is designed for a hyper-focused, single-item upsell.
Timing is Everything: This appears after checkout but before the Thank You page. The customer does not need to re-enter credit card info—ensure your copy reflects this ease (e.g., "Instantly add to your order").
Inventory Check: Ensure the product you select has healthy stock across all variants. If a variant is sold out, it may frustrate the user.
Main Features:
Displays a single product with its available variants.
Offers a dropdown or button for variant selection.
Includes a “Pay Now” button to instantly add the upsell item.
Ideal for personalized, time-sensitive offers after a customer has completed their checkout.
Configuration Options:
Select the product and its default variant.
Customize the heading and call-to-action text.
Set the display layout (vertical or horizontal).
Limitations:
Works only on the post-purchase page.
Limited to one product at a time.
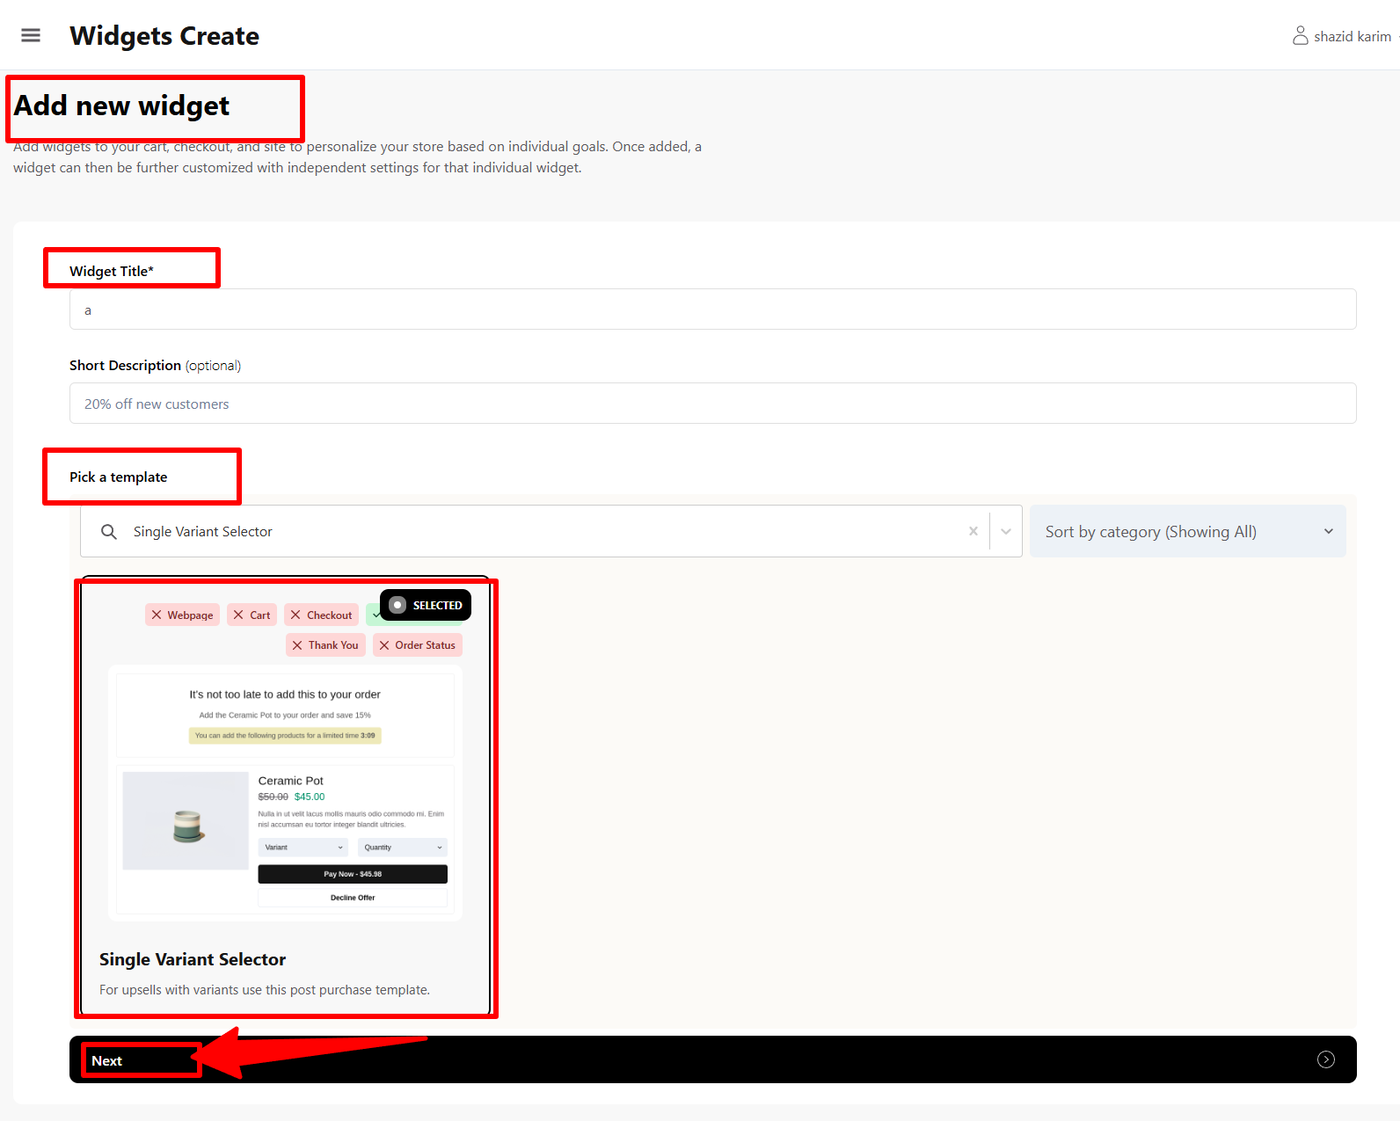
Step-by-Step Creation
Click Create Widgets: From your dashboard, click Create Widgets. A new page titled "Add New Widgets" will appear.
Fill in the Details: Fill in the Widget Title and a Short Description for your widget.
Select a Template: If there are any existing widgets that align with your title, they will appear at the bottom of the page. Select the one you wish to use.
Single Variant Selector Widget: Content Configuration
After selecting your template and clicking Next, you will be taken to the widget's main configuration page. Here, you will customize its content and define its behavior.
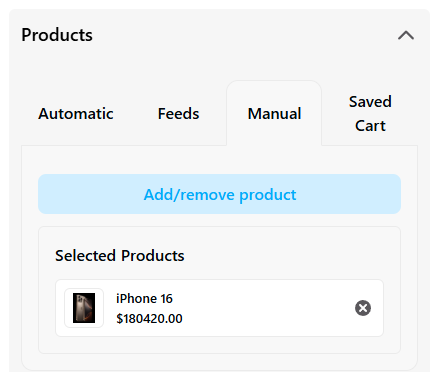
The first step is to set your Trigger Products. These are the products a customer must purchase for the Single Variant Selector widget to appear on the post-purchase page. To do this, you will need to:
Select the Manual option to add your products.
Search for and select the specific products you want to act as triggers.
Once you have added your trigger products, you can then proceed to customize the general settings for your widget, such as its heading and appearance.
After making your desired changes, click Save Changes.
Advanced Settings
Once you have configured the content and style of your widget, you can use the Advanced section for further customization. Here, you have two primary options:
Device Targeting: This lets you control which devices your widget is visible on (e.g., desktop, mobile, tablet), ensuring an optimal user experience.
Custom CSS: This allows you to write custom CSS to apply specific styles that go beyond the standard configuration options.
After making any adjustments, click Save Changes. Your widget is now fully built and ready to be used.
Publishing Your Configured Widget Live
This following documentation section provides the final, detailed steps required to publish your fully configured widget and make it visible to customers on your live storefront.
01. How to successfully setup a widget
02. Understanding and Creating Audiences